The academic structure must be configured first. This foundation powers enrollment, attendance, exams, and all other modules.
Academic Years
Define the school years (e.g., 2024–2025, 2025–2026).
Navigate to Academic Setup → Academic Years in the sidebar.
Click Create Academic Year.
Enter the name, start date, and end date.
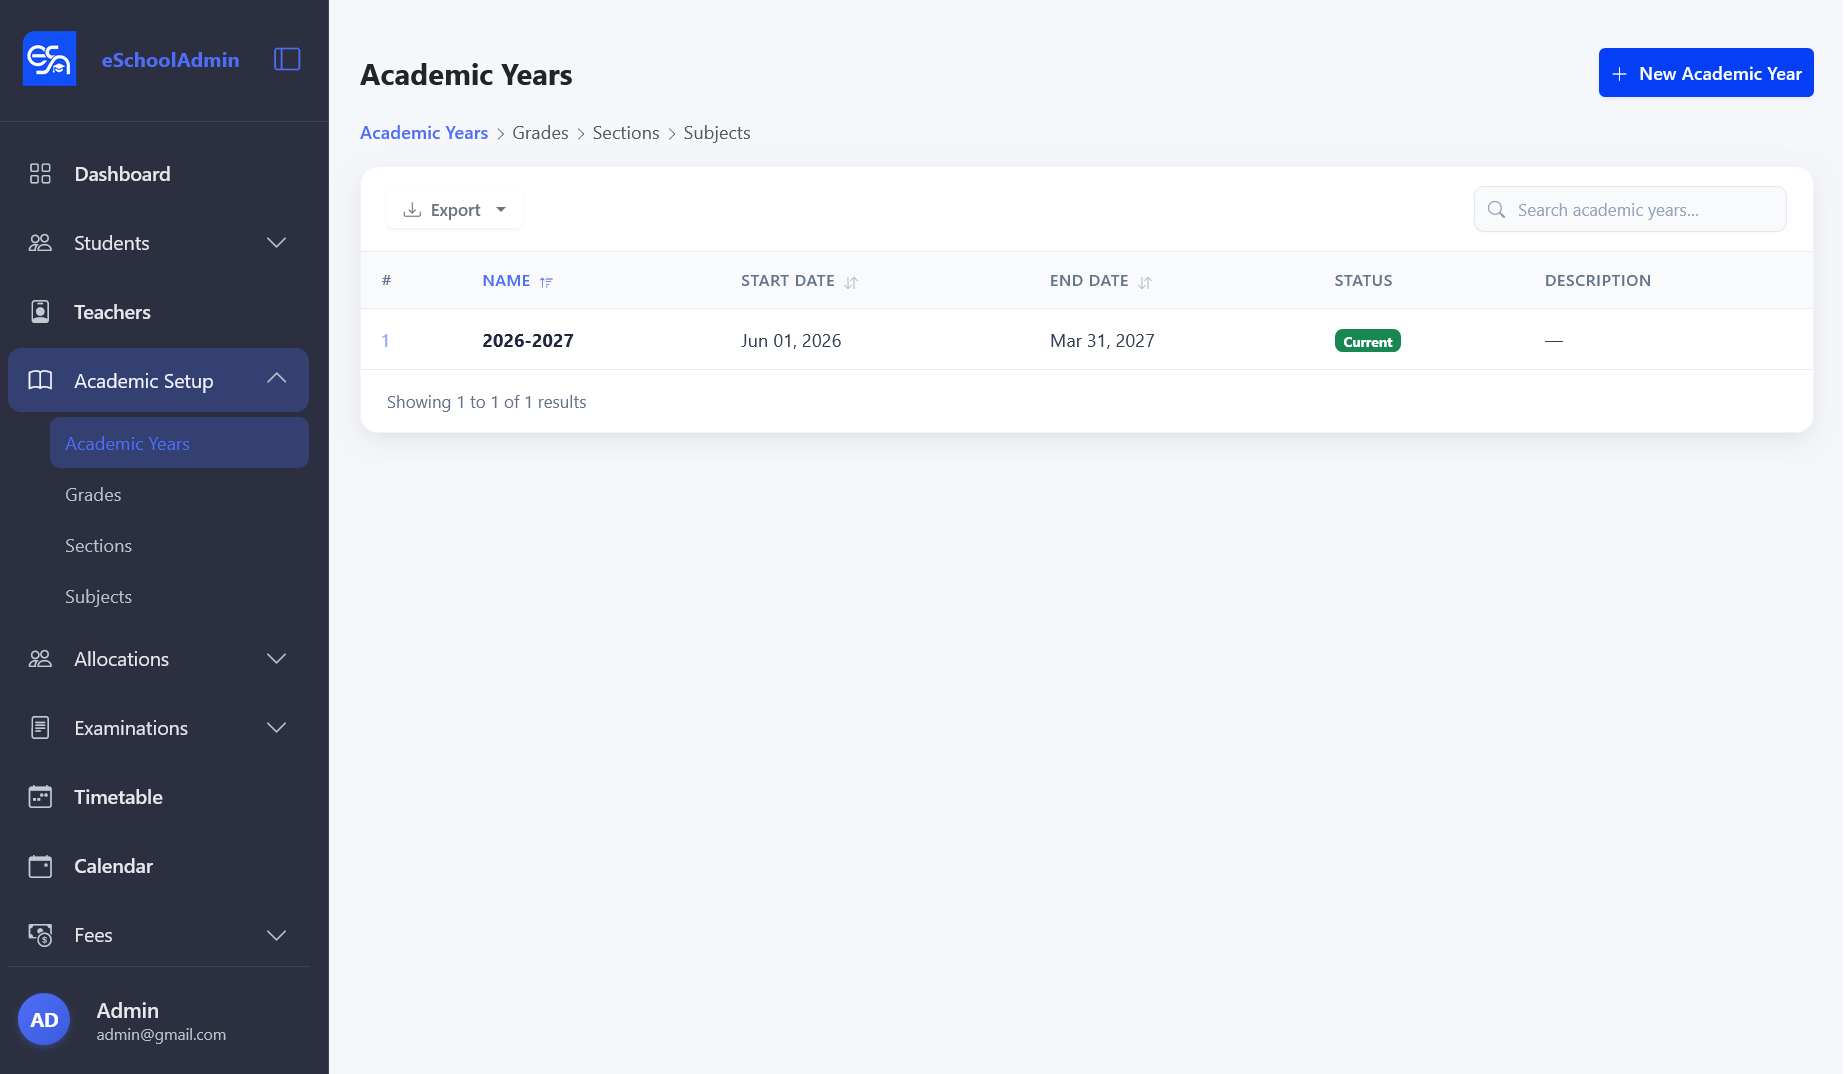
The active academic year is used as the default context throughout the system.
Academic Years list — the active year is highlighted with a Current badge.
Grades
Define grade levels or class names (e.g., Grade 7, Grade 8, Form 1).
Navigate to Academic Setup → Grades.
Click Create Grade.
Enter the grade name and optionally set the order.
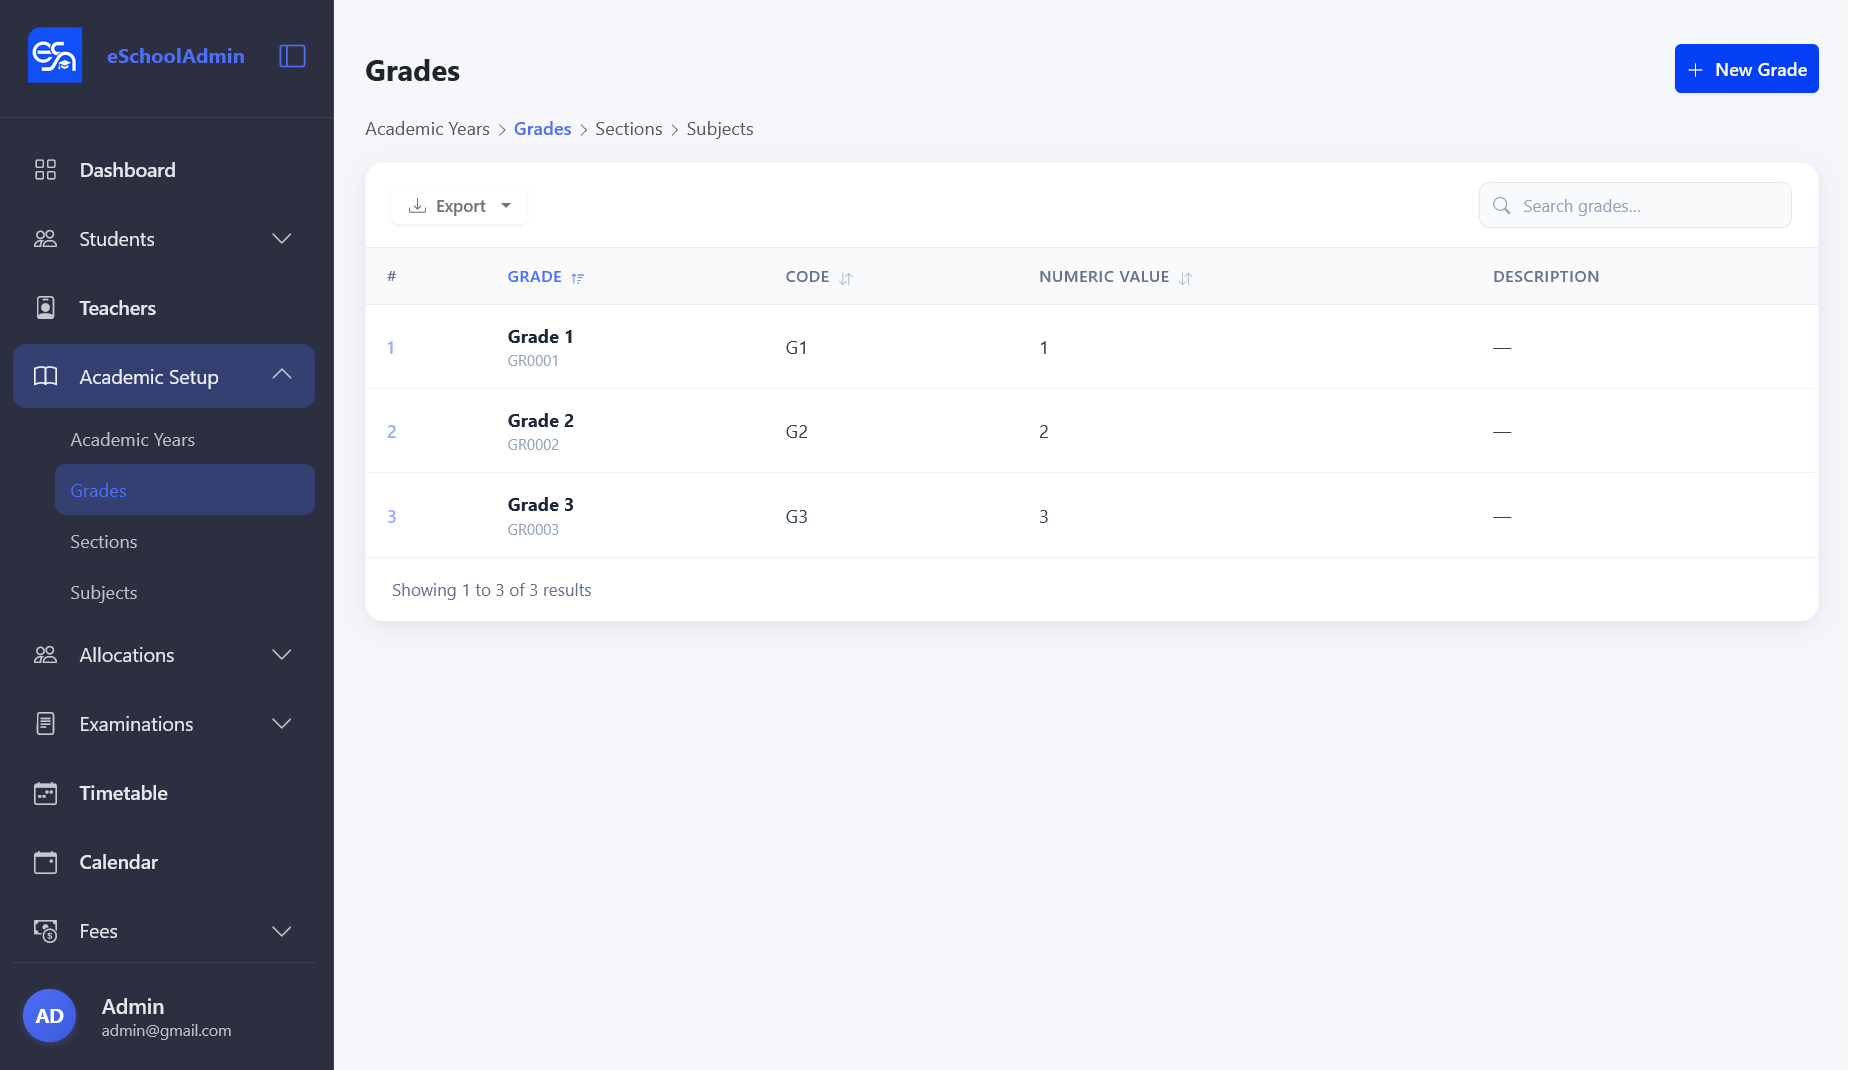
Grades list — each grade has a name, code, and numeric value.
Sections
Divide each grade into classrooms or streams (e.g., Grade 7-A, Grade 7-B).
Navigate to Academic Setup → Sections.
Click Create Section.
Select the parent Grade, enter the section name, and optionally set a capacity.
Use the Students action to view which students are in a section.
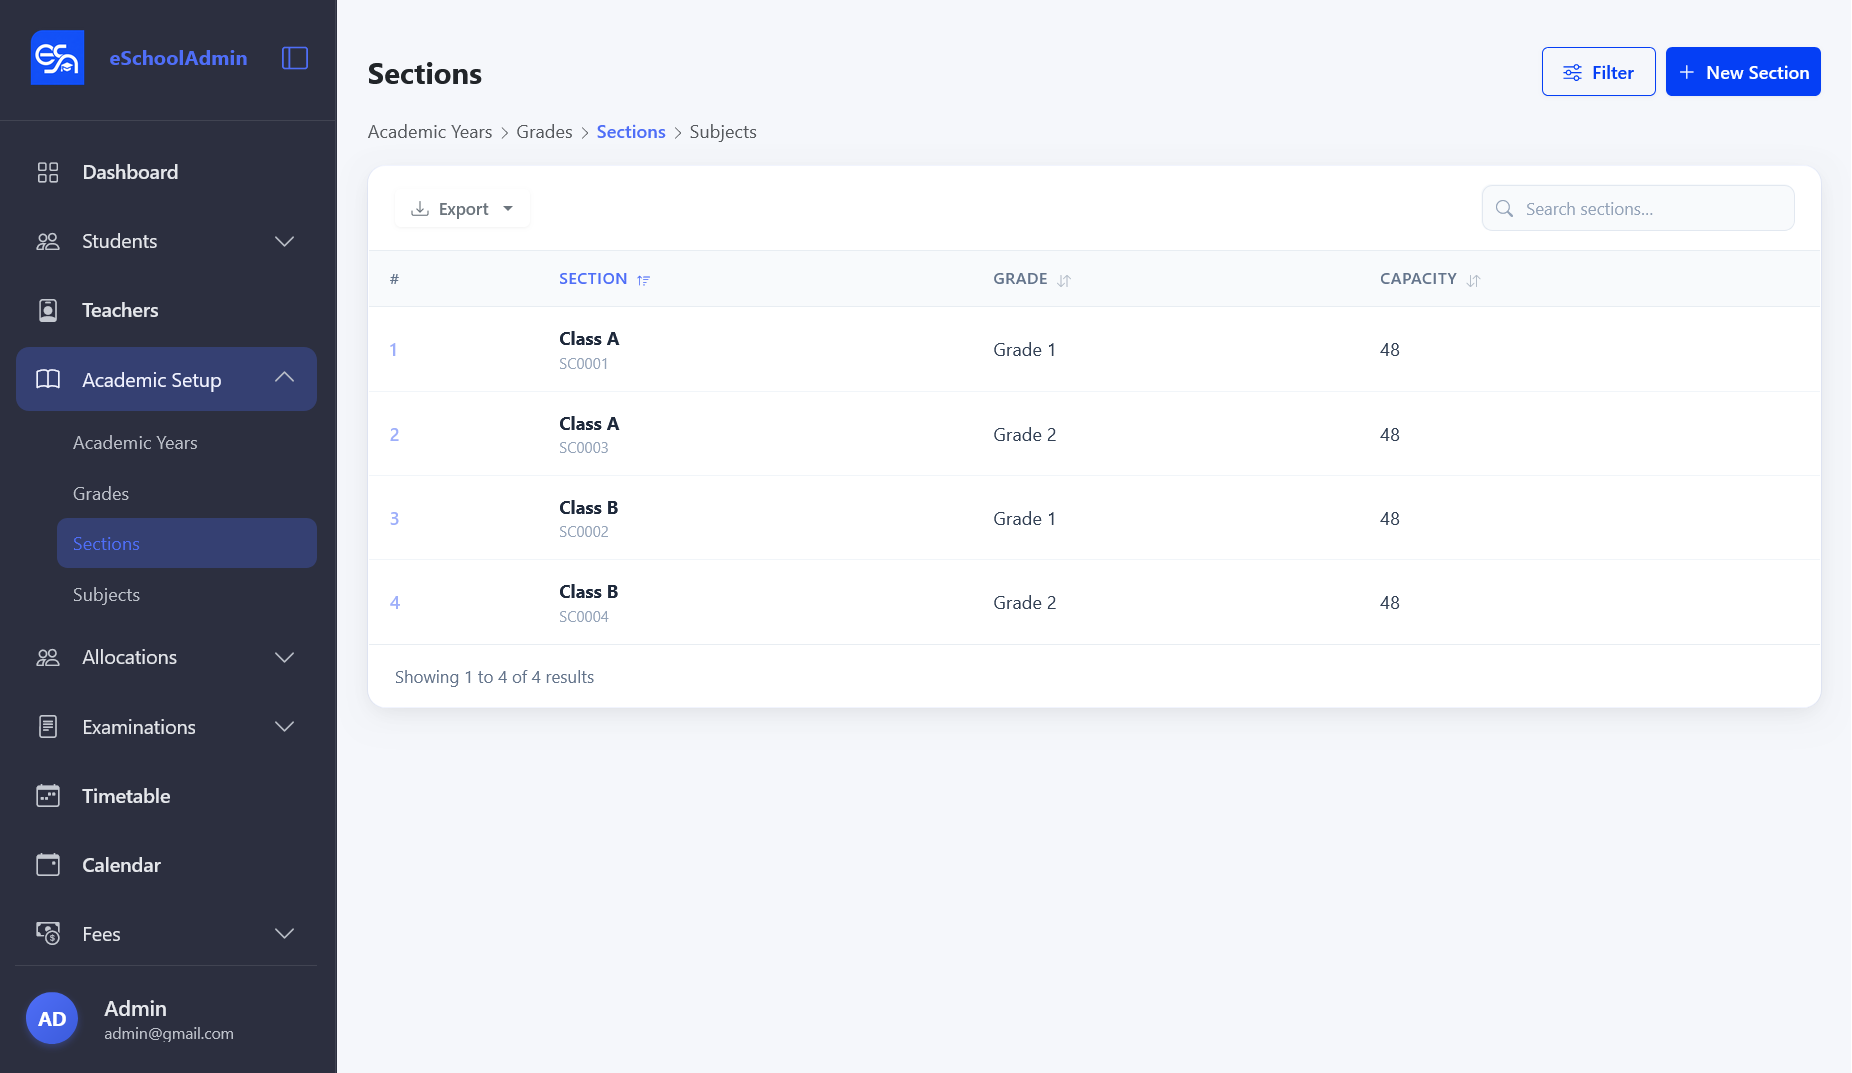
Sections list — each section is linked to a grade with a max capacity.
Subjects
Define the subjects taught at the school (e.g., Mathematics, English, Science).
Navigate to Academic Setup → Subjects.
Click Create Subject.
Enter the subject name and code (if applicable).
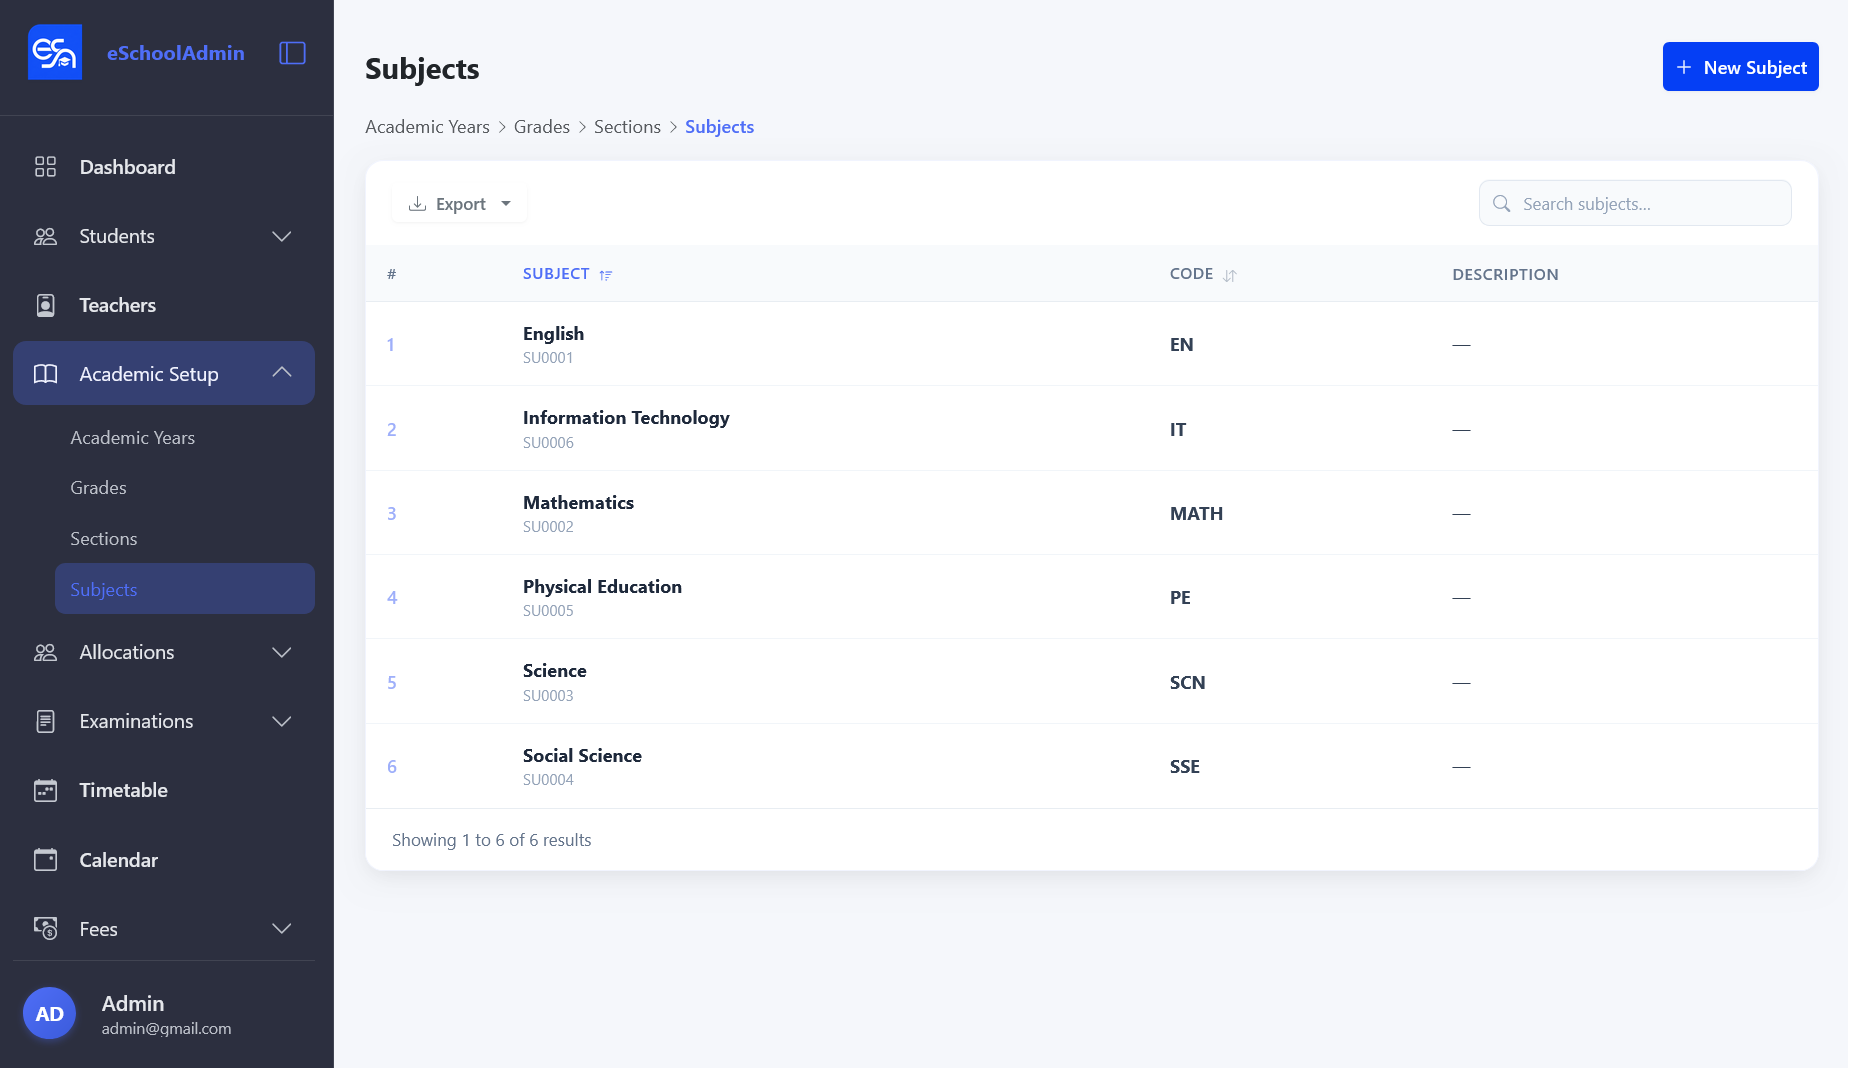
Subjects list — each subject has a name, code, and optional description.
2. Students
Maintain the master list of all students in the school.
Navigate to Students in the sidebar.
Use the search box to find a student by name, admission number, or phone.
Filter by gender using the filter bar.
Right-click (or long-press) a row to open the context menu with View, Edit, Report Card, and Delete options.
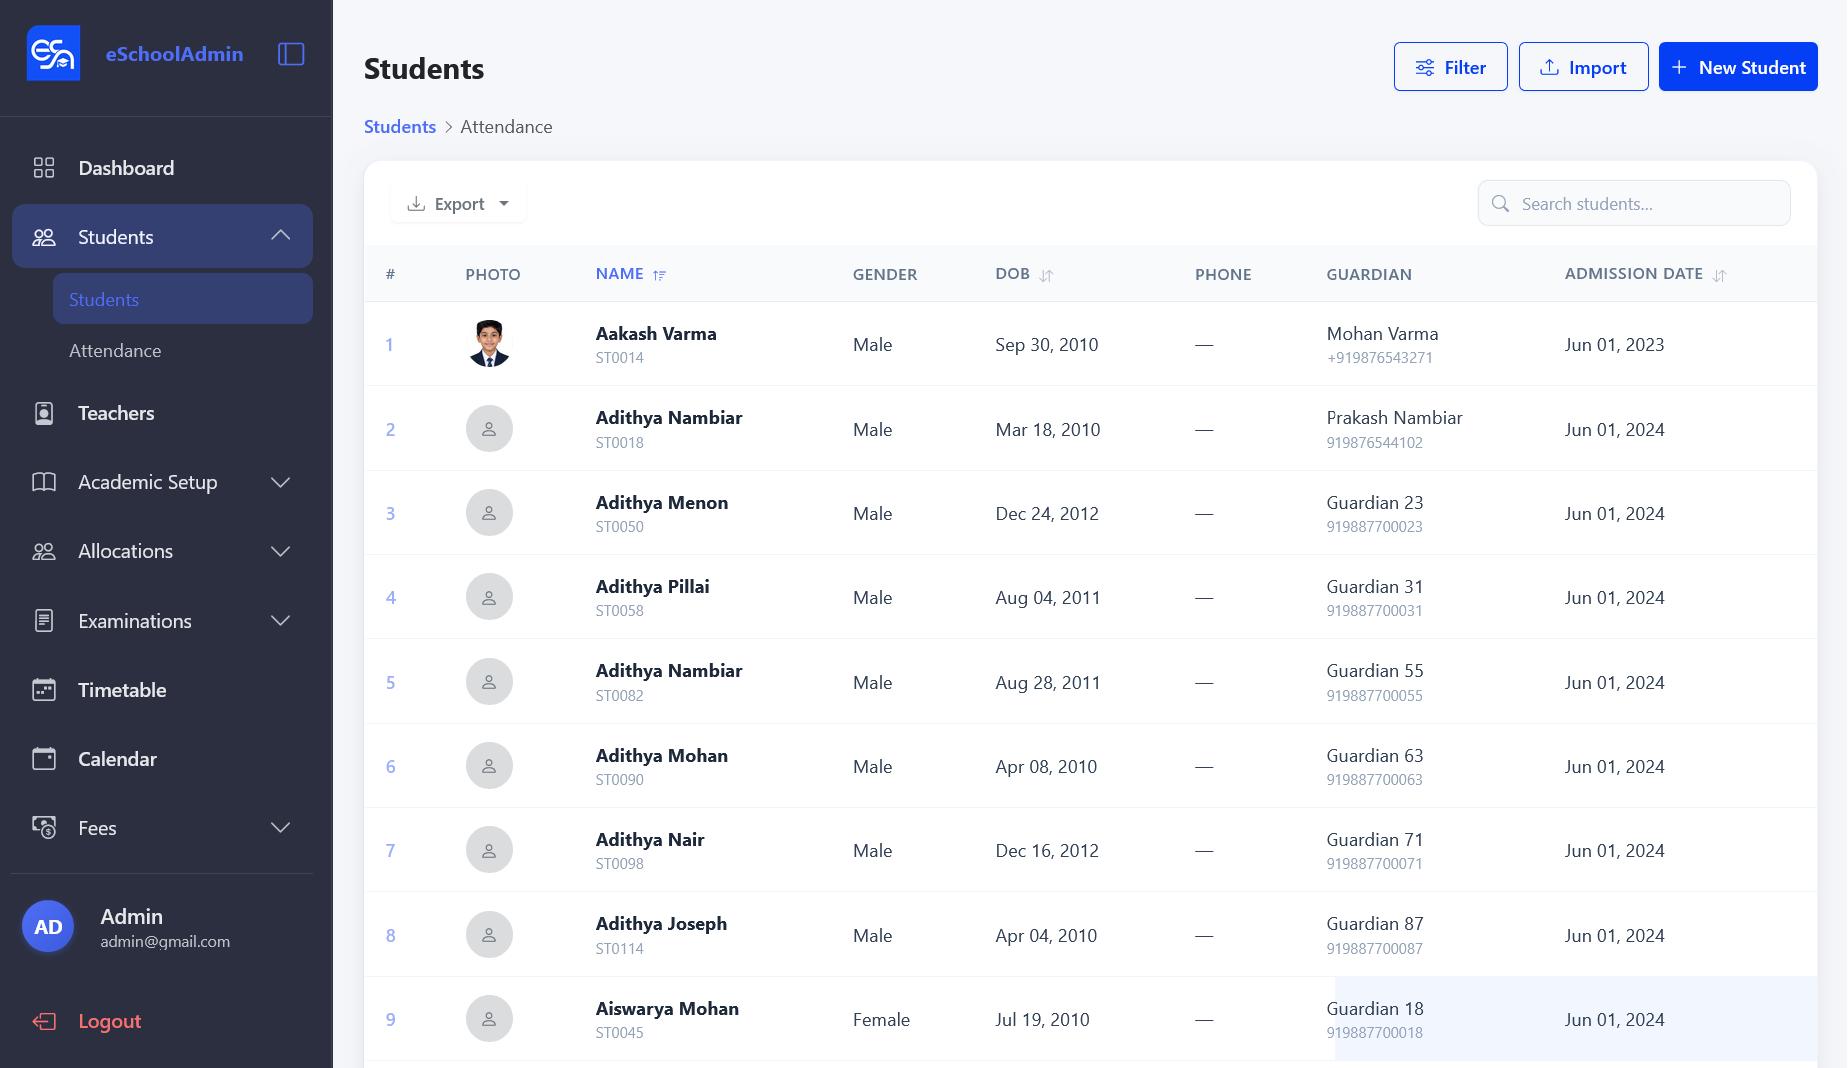
Student list — searchable and filterable with Export and Import options.
To add a new student:
Click New Student on the list page.
Enter personal details (name, date of birth, gender, address, phone, email).
Add guardian/parent information.
Upload a student photo.
Assign an admission number and click Save.
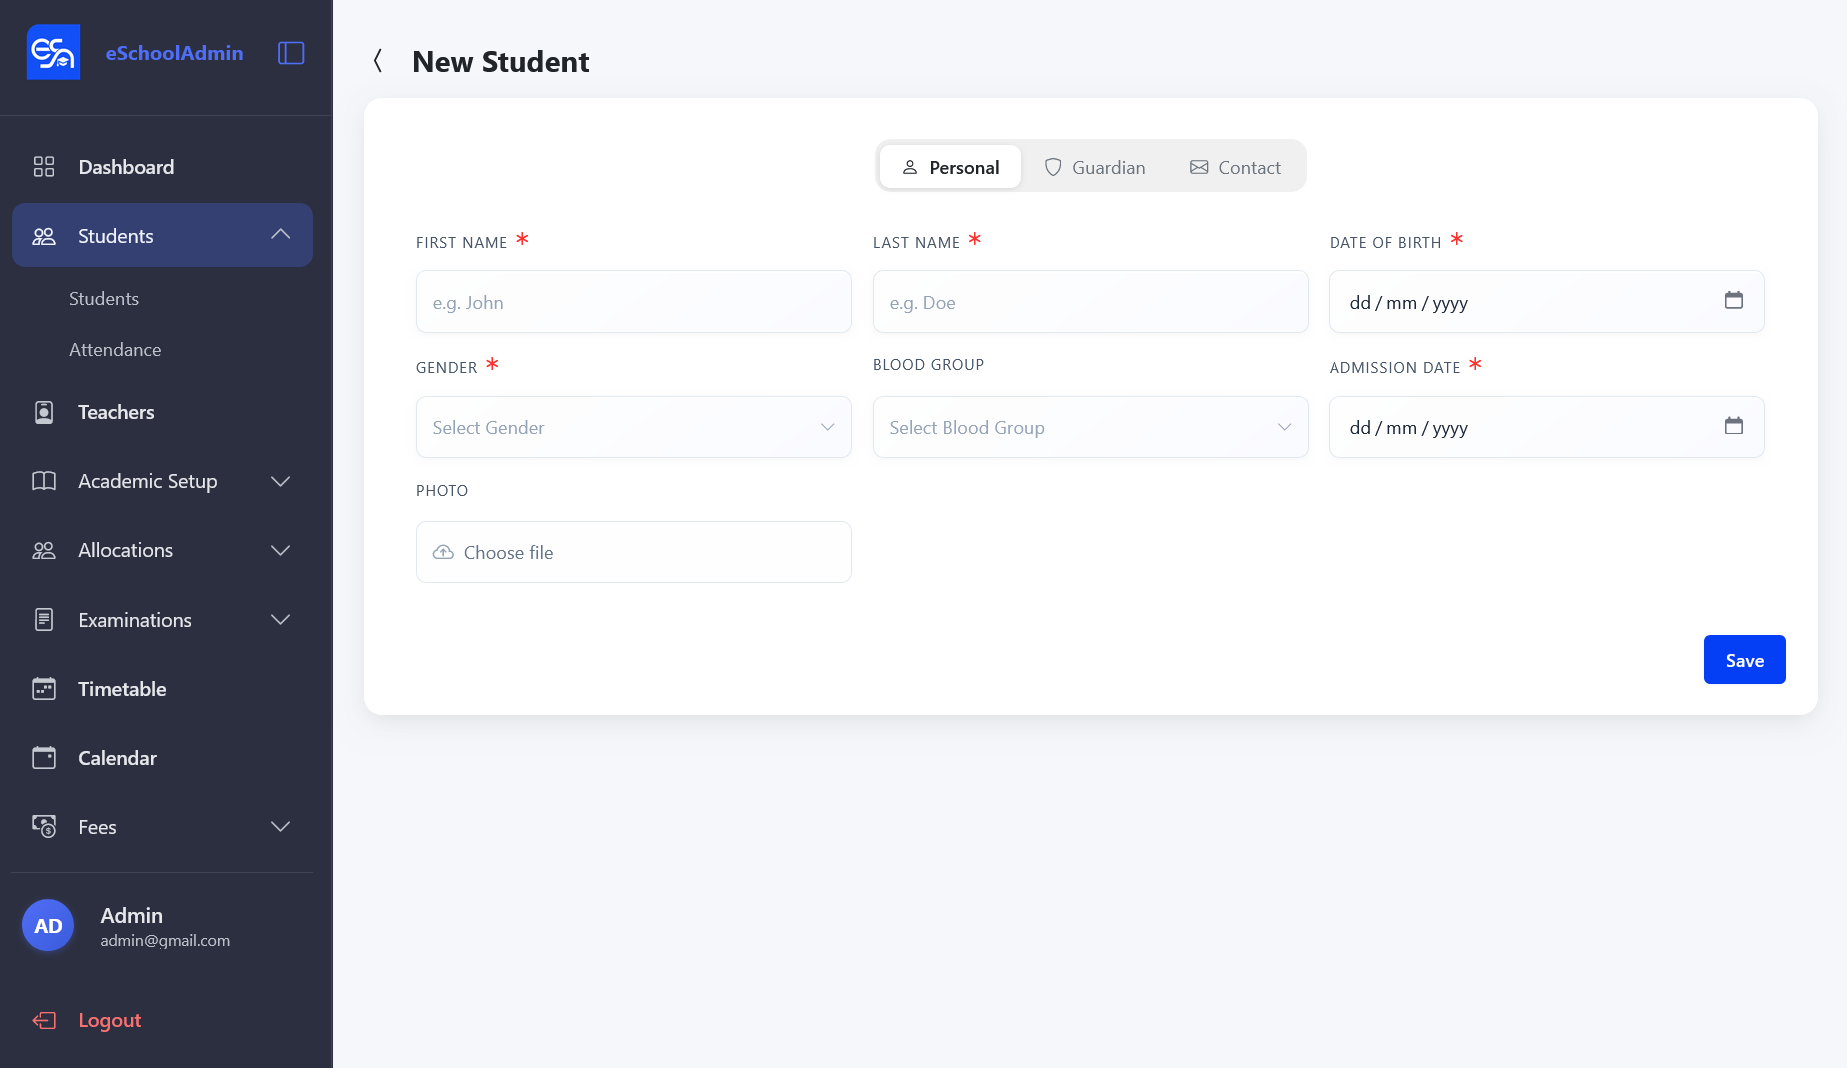
Create Student — Personal tab for basic information and photo upload.
Student Profile: Click View on any student to see their full profile — personal info, enrollment history, attendance records, exam results, and fee payment status.
3. Teachers
Maintain records of all teaching staff.
Navigate to Teachers in the sidebar.
The list page shows all teachers; use the search box to filter.
Click Create Teacher to add a new record — enter personal details, contact info, and employee ID.
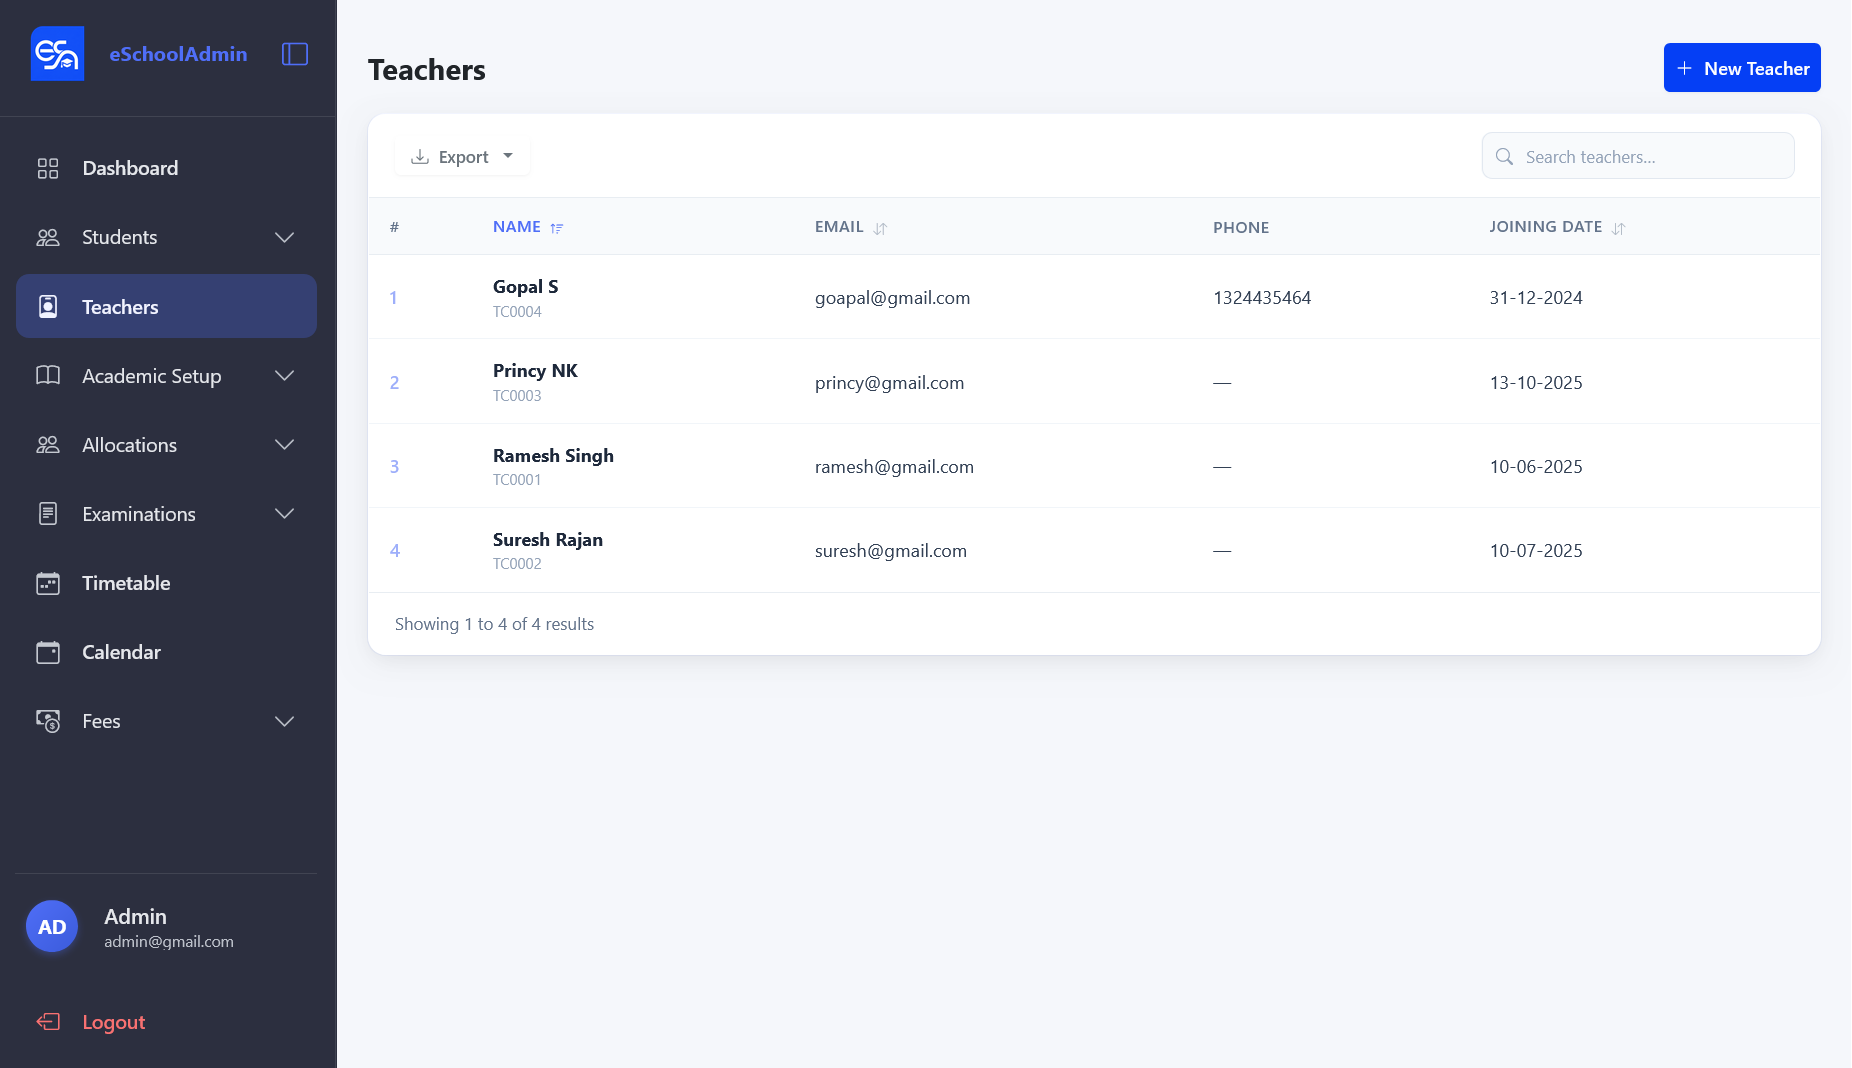
Teachers list — searchable with Export and New Teacher options.
4. Enrollment
Assign students to a specific grade and section for an academic year.
Ensure Academic Years, Grades, Sections, and Students are set up first.
Navigate to Allocations → Enrollments.
Click Create Enrollment and select the student, academic year, grade, and section.
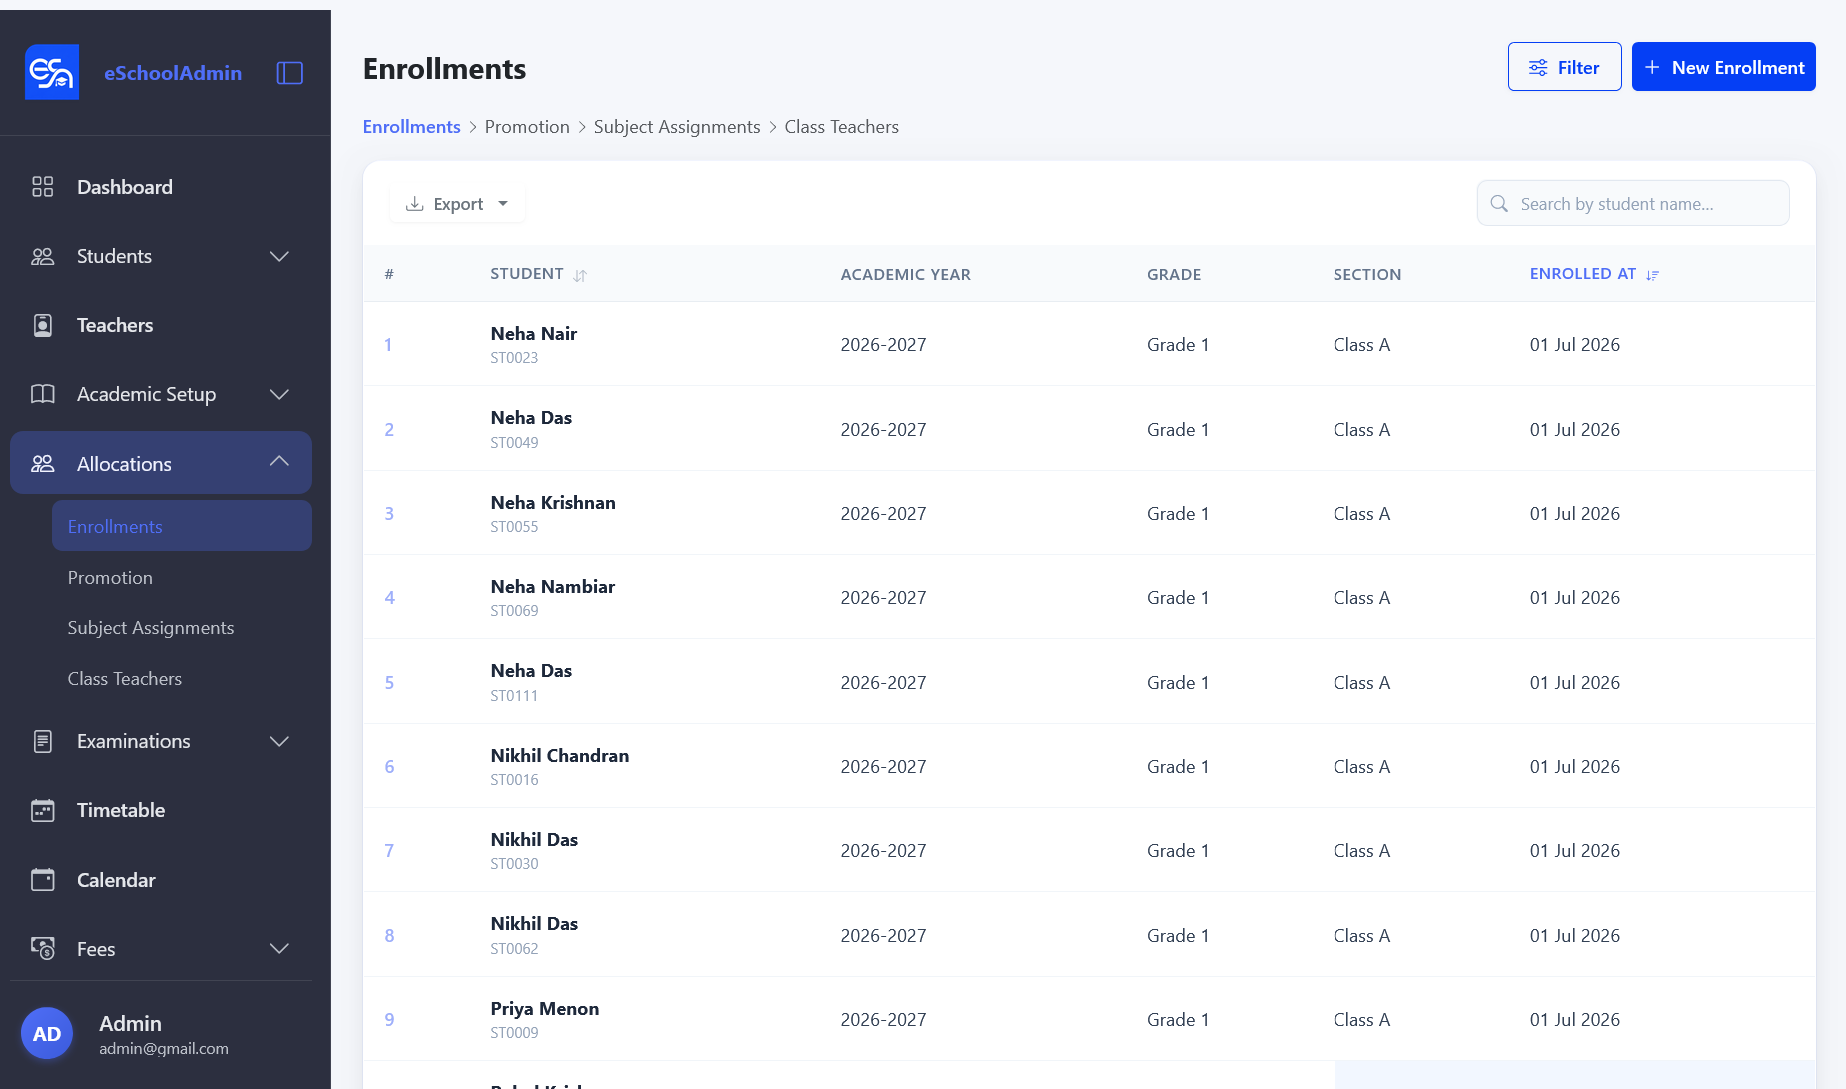
Enrollments list — shows which students are in which grade and section.
5. Subject & Class Teacher Assignments
Subject Assignments
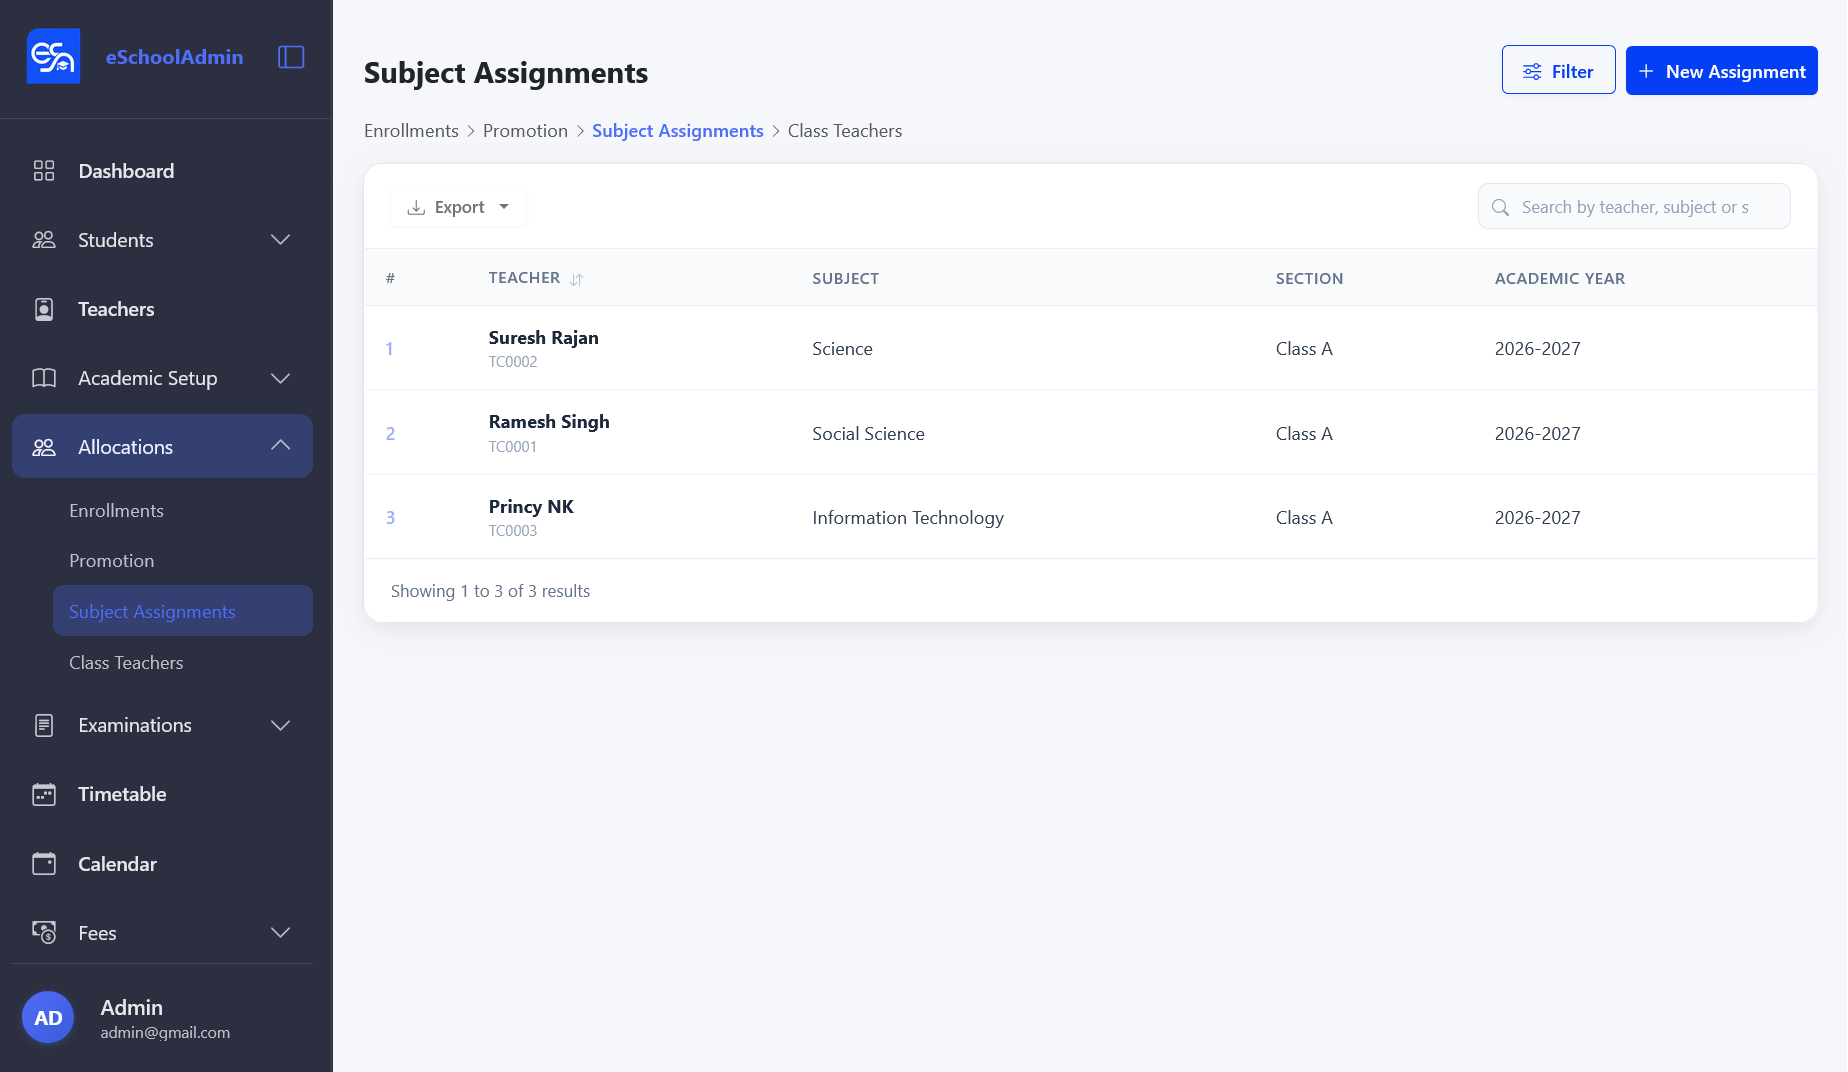
Assign teachers to the subjects they teach in specific classes.
Navigate to Allocations → Subject Assignments.
Click Create Assignment and select the teacher, grade, section, and subject.
Subject Assignments — links teachers to subjects within specific sections.
Class Teachers
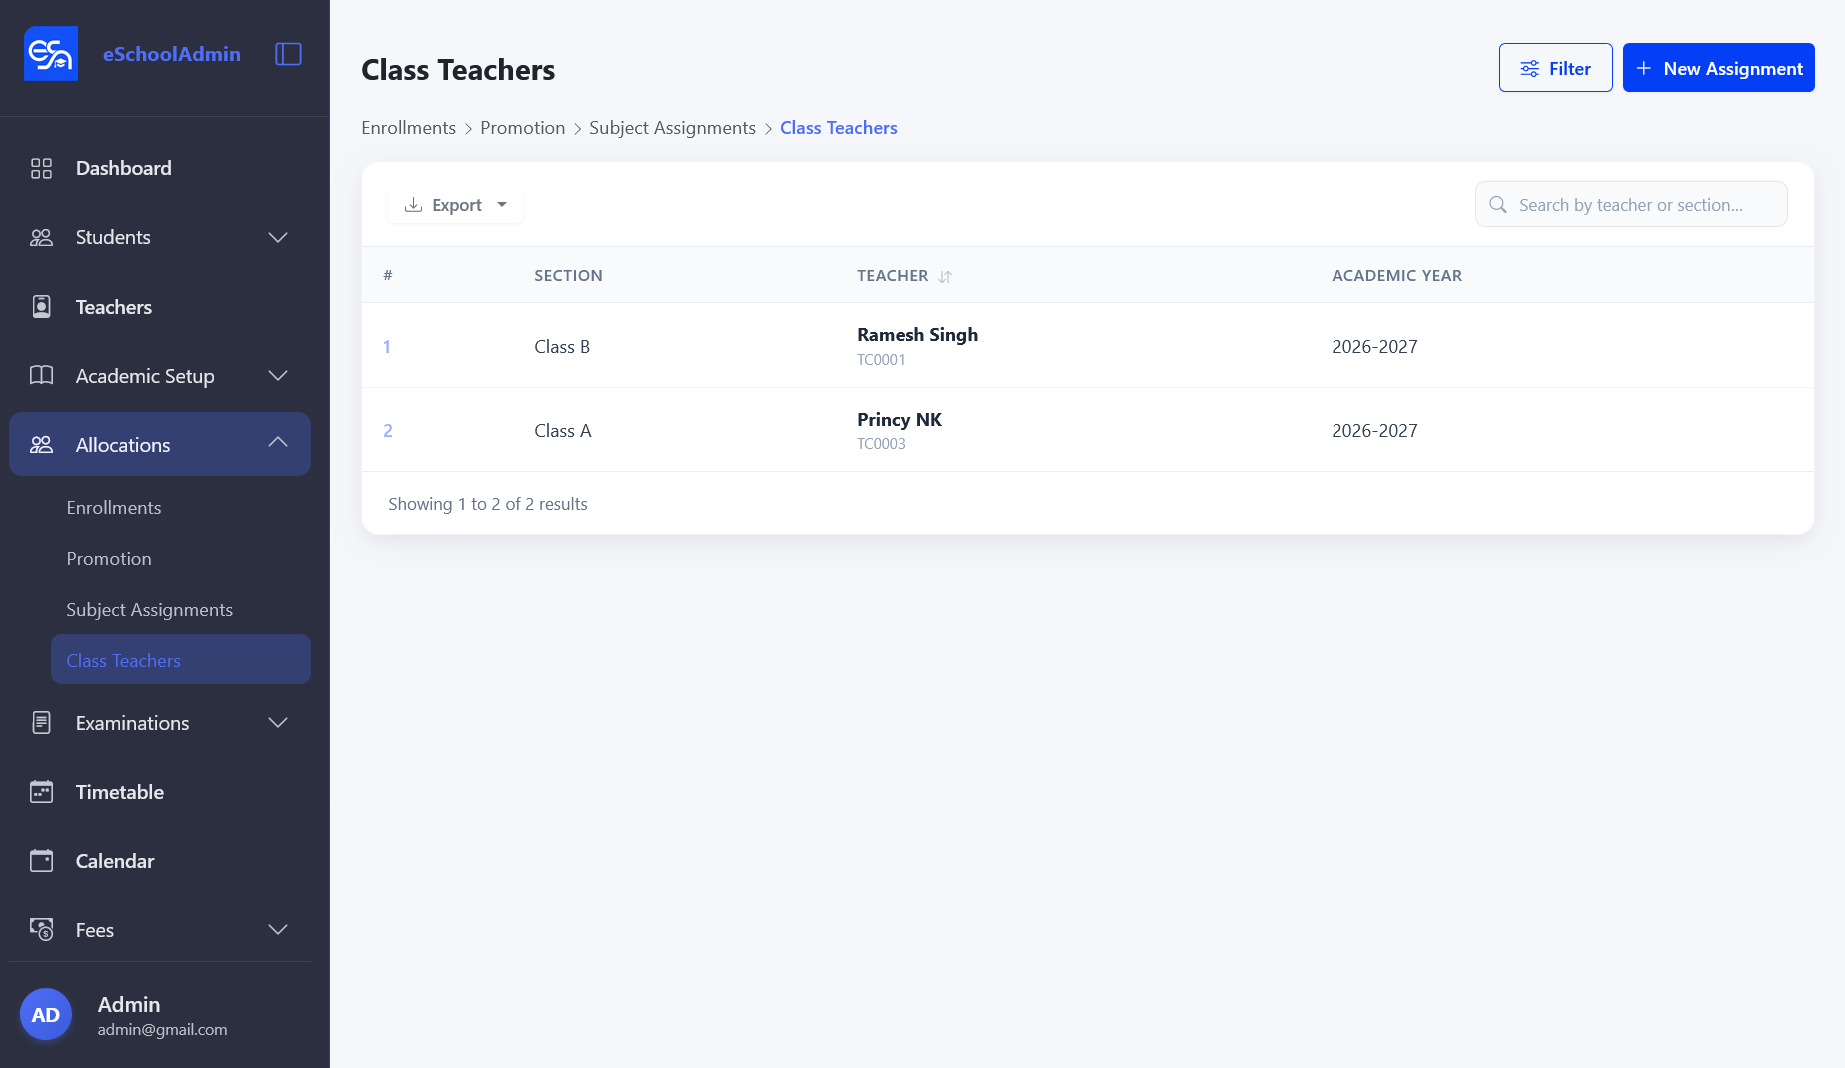
Assign a homeroom or form teacher to each section.
Navigate to Allocations → Class Teachers.
Click Create Assignment and select the academic year, section, and teacher.
Class Teachers — assigns a form teacher to each section.
6. Attendance
Record daily student attendance per section.
Navigate to Students → Attendance in the sidebar.
Click Take Attendance.
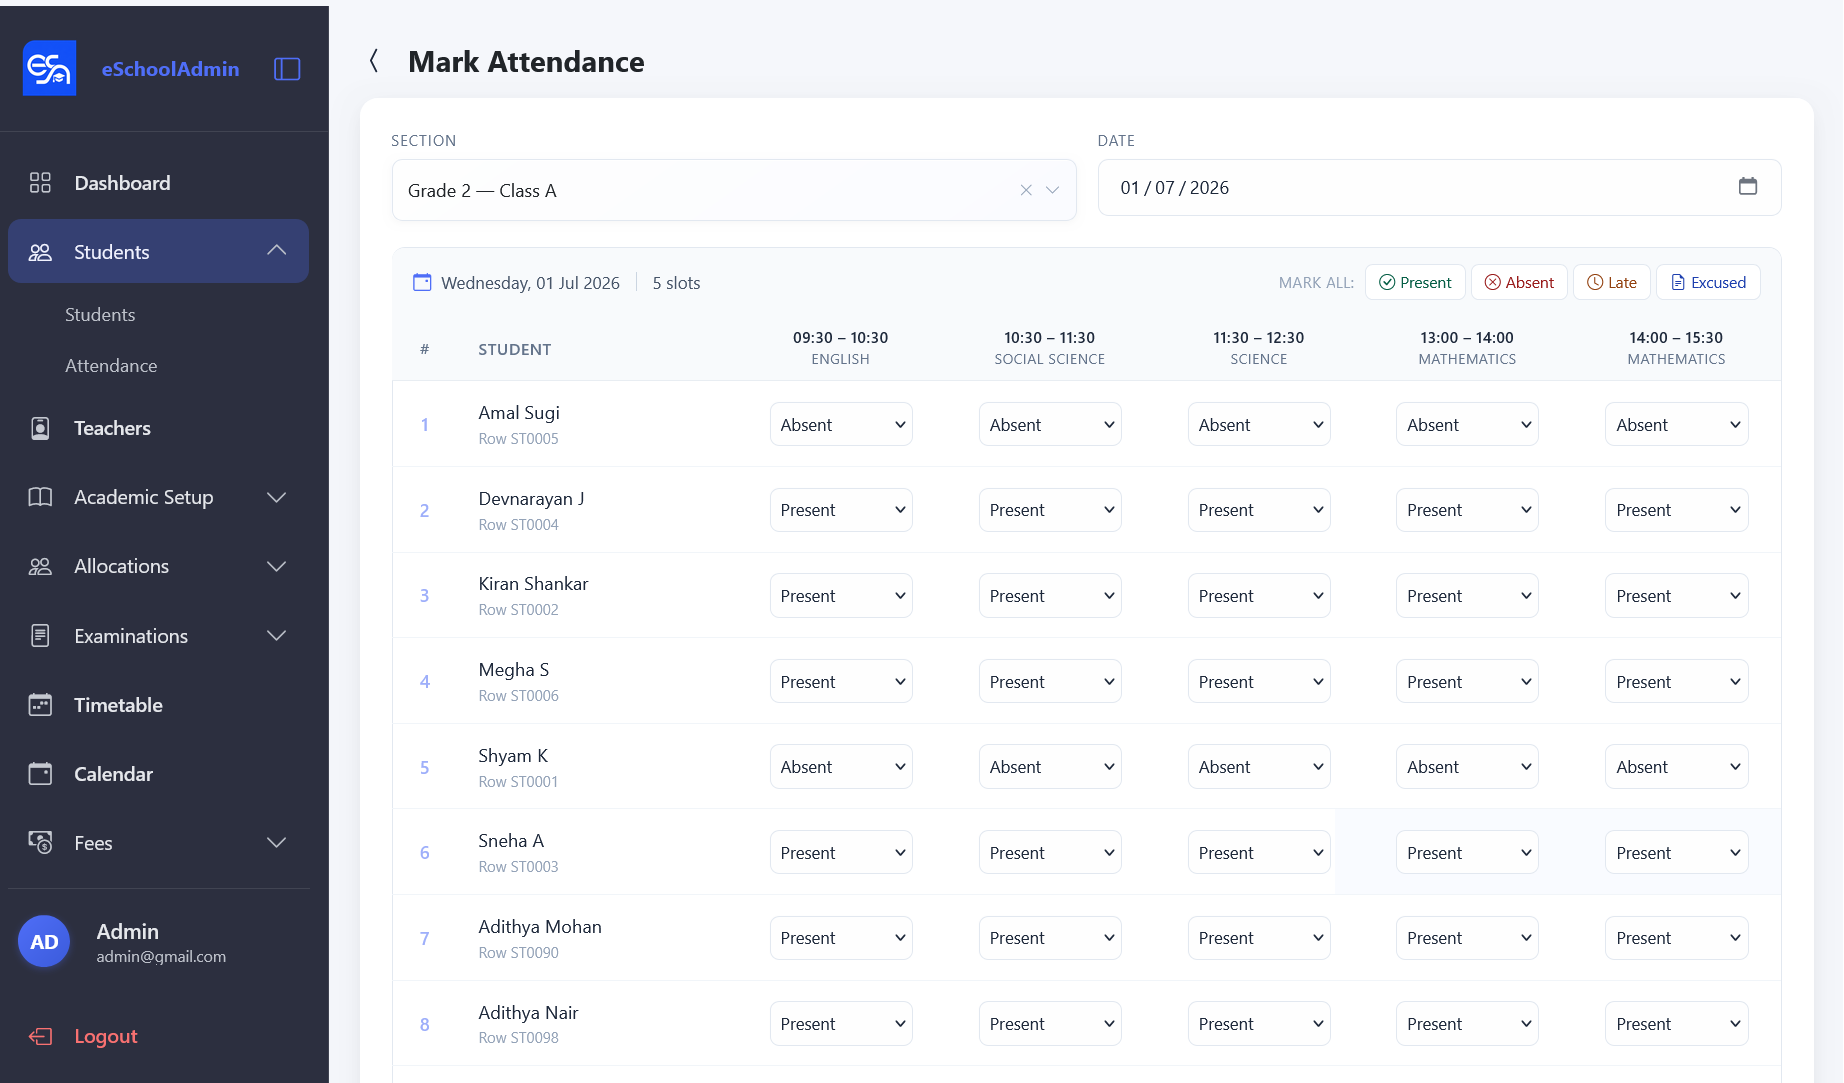
Select the grade, section, and date.
A list of enrolled students appears — mark each as Present, Absent, or Late.
Submit to save the record.
Mark Attendance — select section and date, then mark each student Present, Absent, Late, or Excused per time slot.
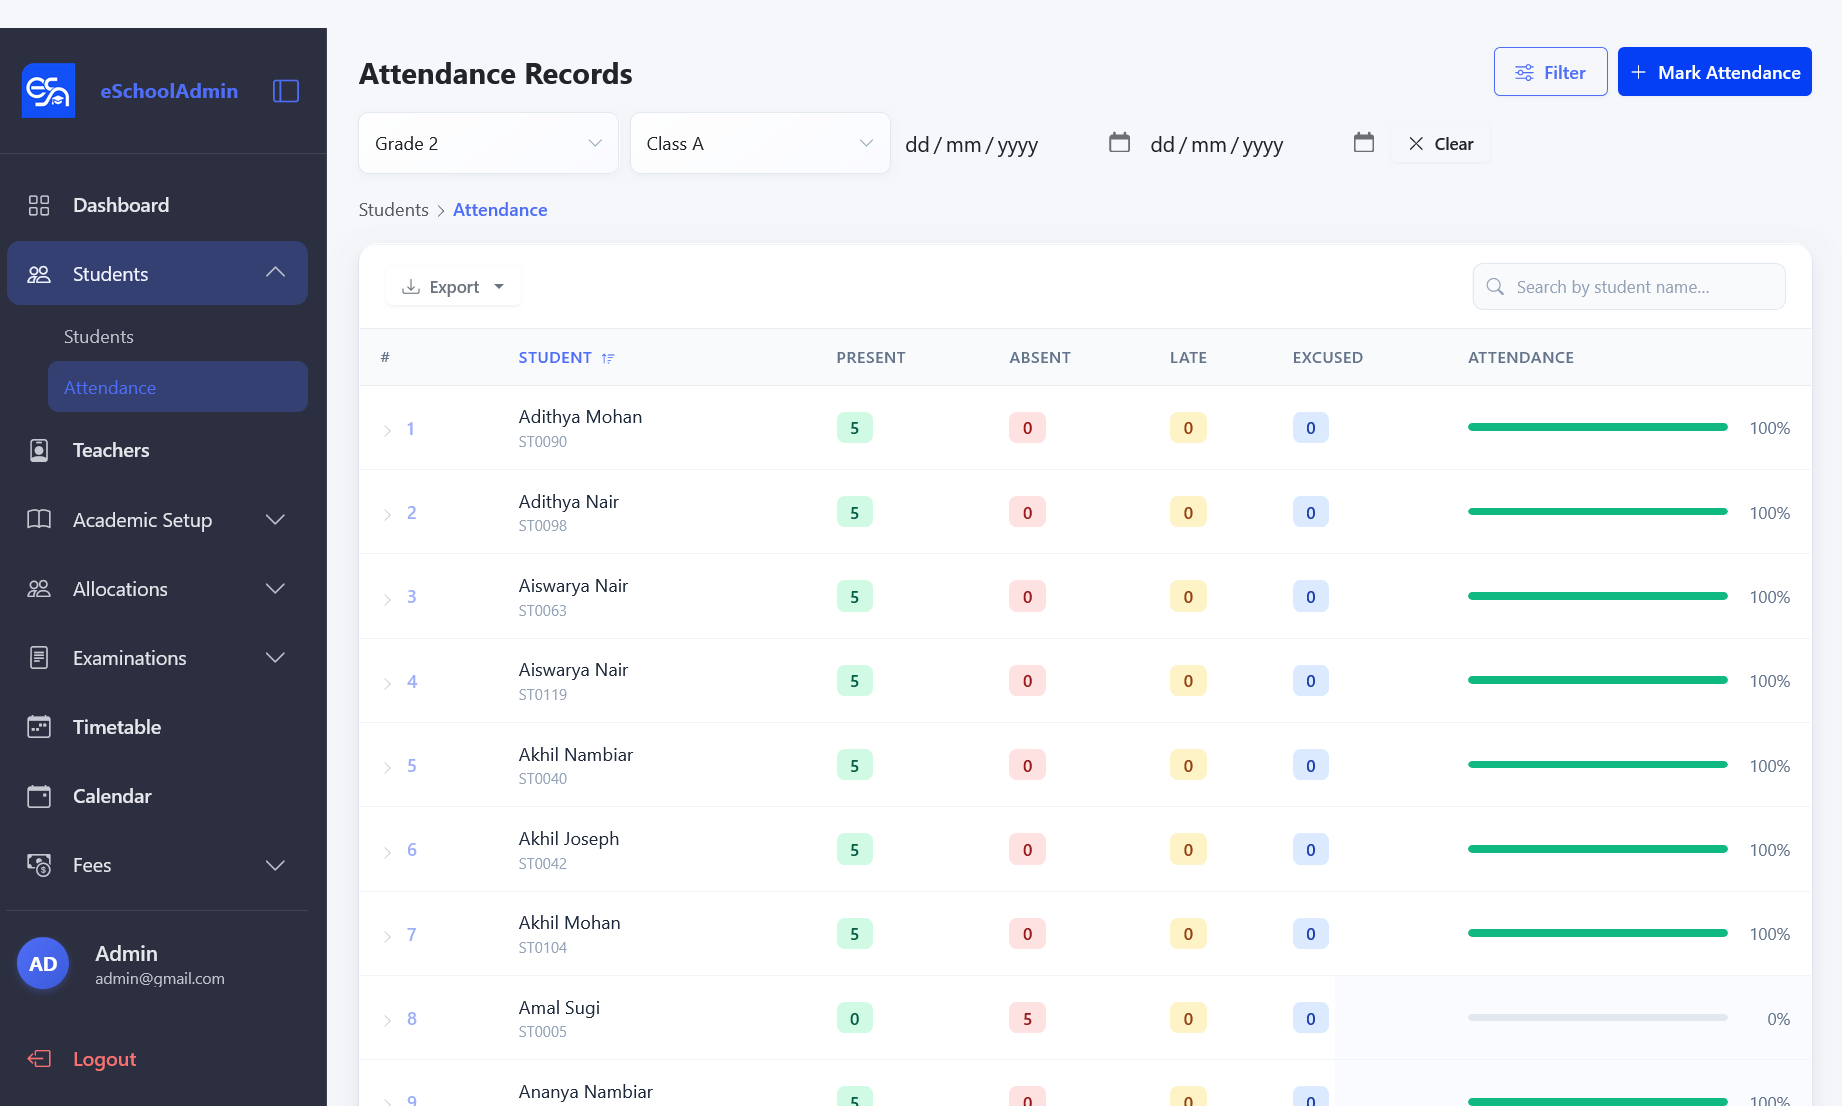
The Attendance Records list shows a summary view filterable by date, grade, and section.
Attendance Records — view attendance summary per student with percentage bar.
7. Exams & Results
Exams
Define examinations (e.g., Mid-Term, Final Exam).
Navigate to Examinations → Exams.
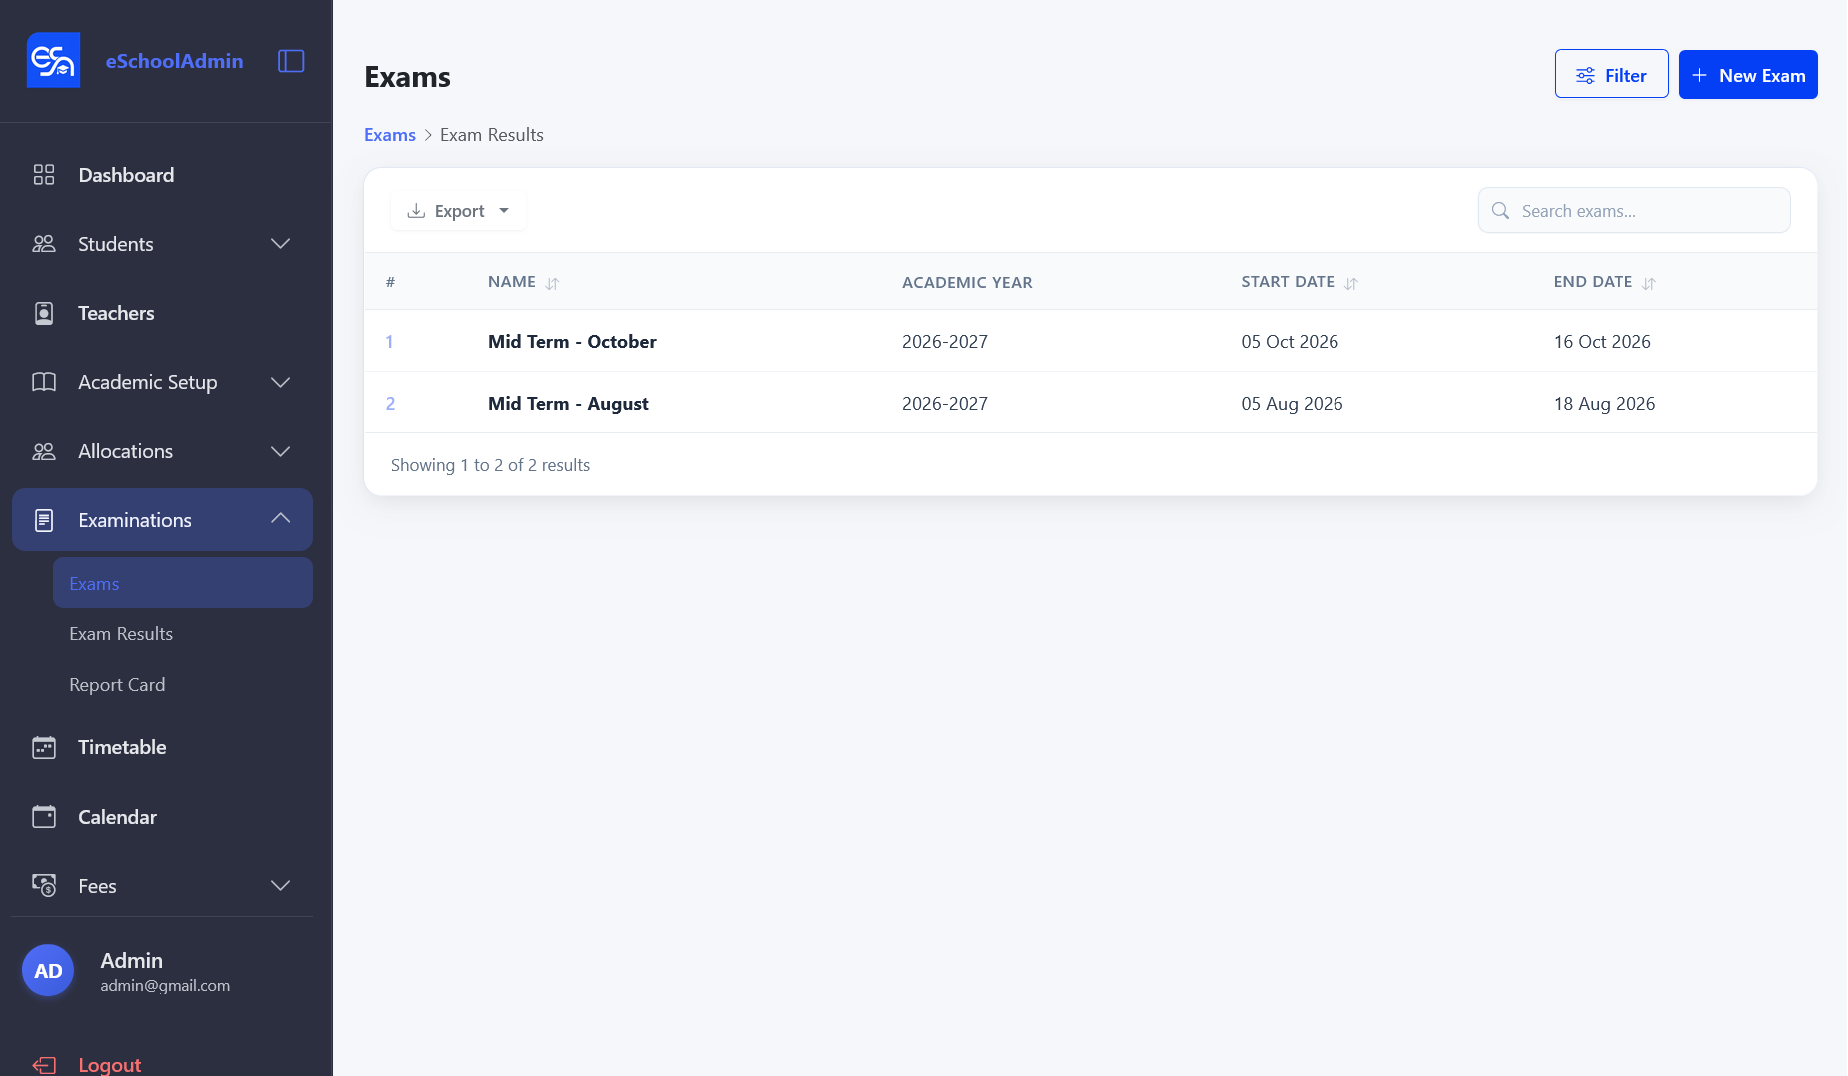
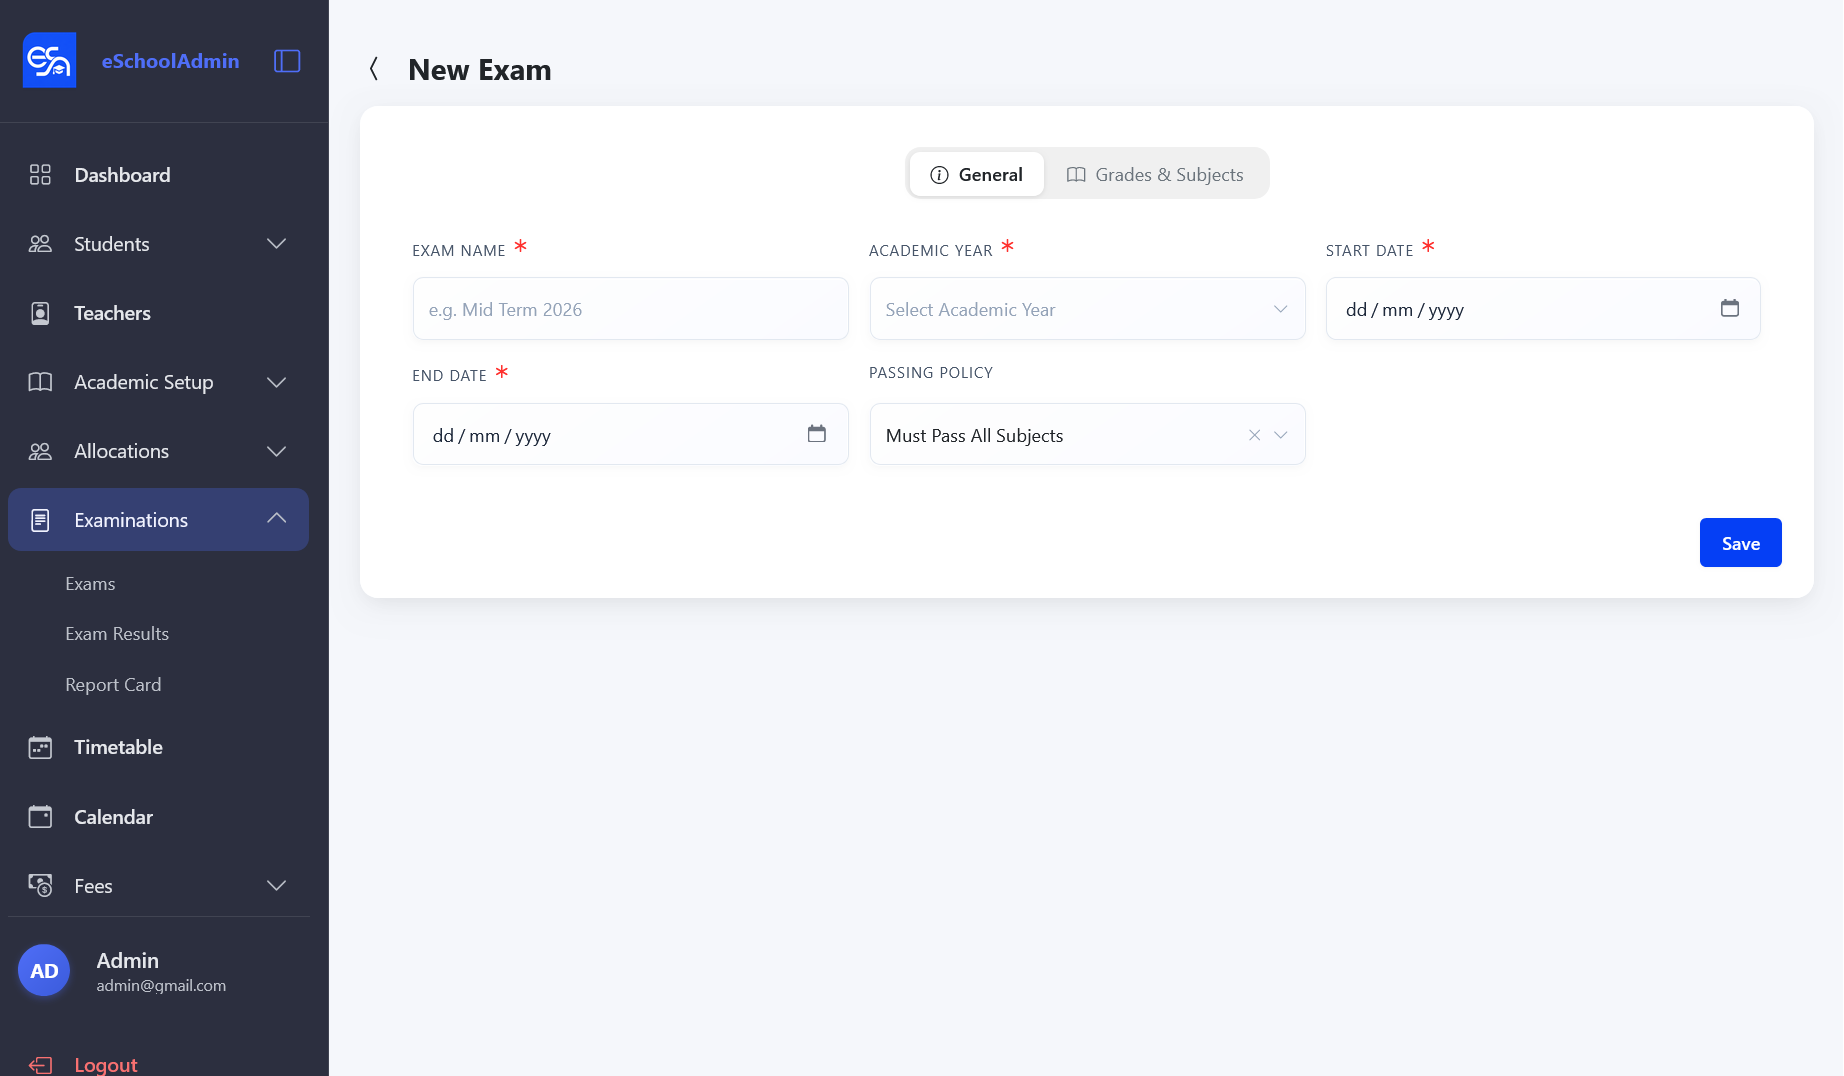
Click Create Exam, enter the name, select the academic year, and set the date range.
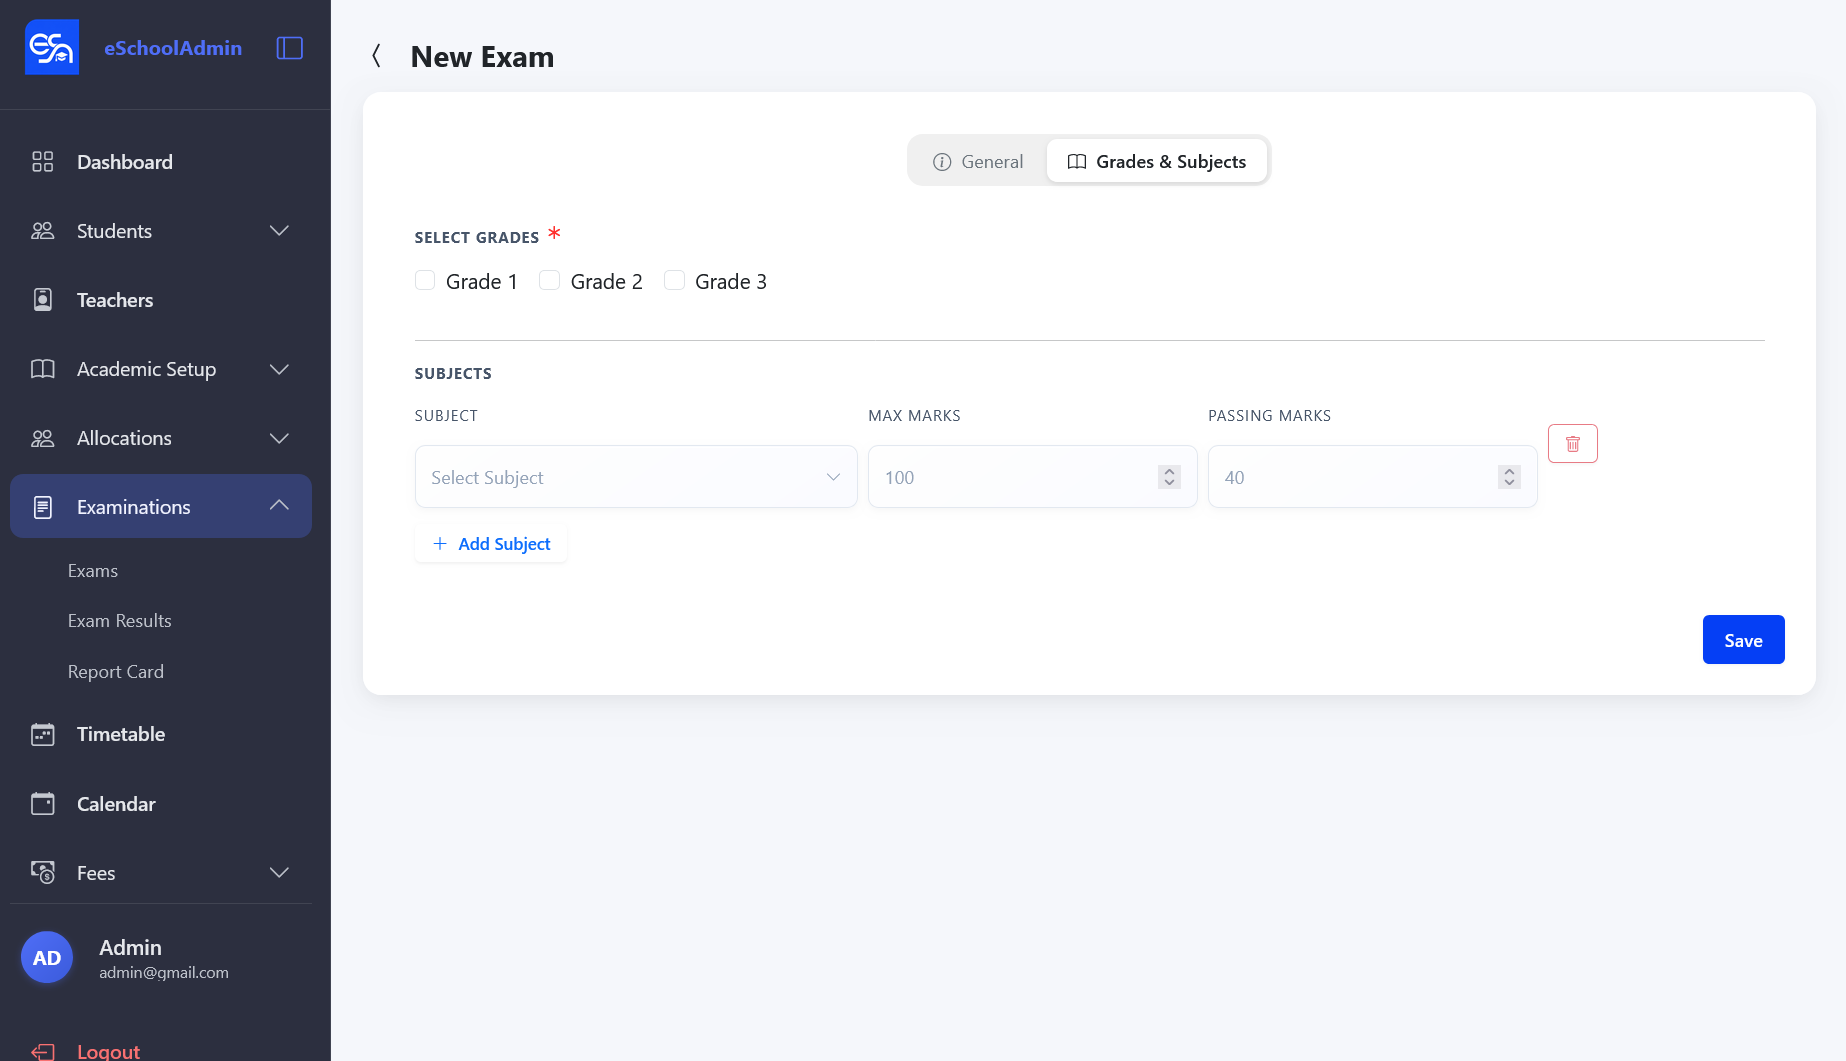
Add the subjects included in this exam.
Exams list — shows all exams with academic year, start date, and end date.Create Exam — enter exam details, select academic year, and configure passing policy.Create Exam — Grades & Subjects tab for selecting applicable grades and configuring max/passing marks per subject.
Exam Results
Enter scores for each student per subject.
Navigate to Examinations → Exam Results.
Click Create Result and select the exam, grade, section, and subject.
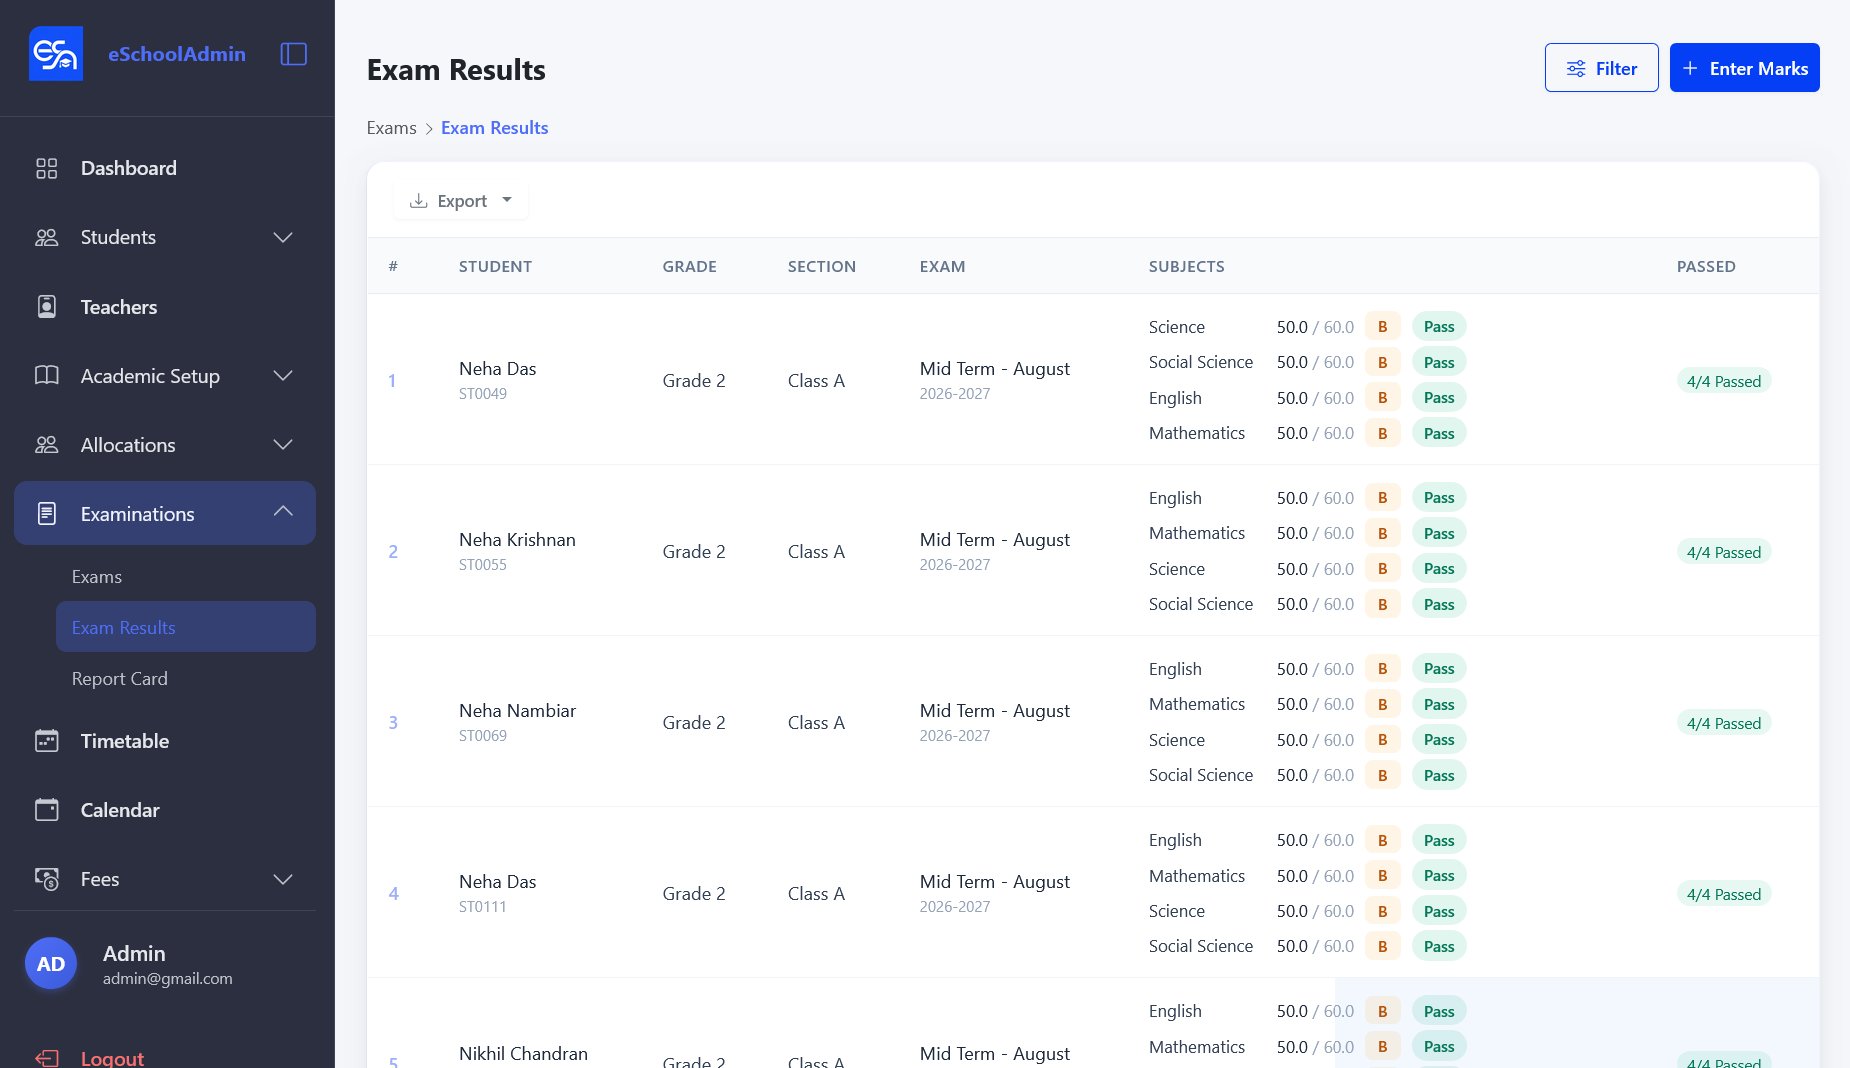
Enter each student's score. Results are automatically graded against configured thresholds (A, B, C, etc.).
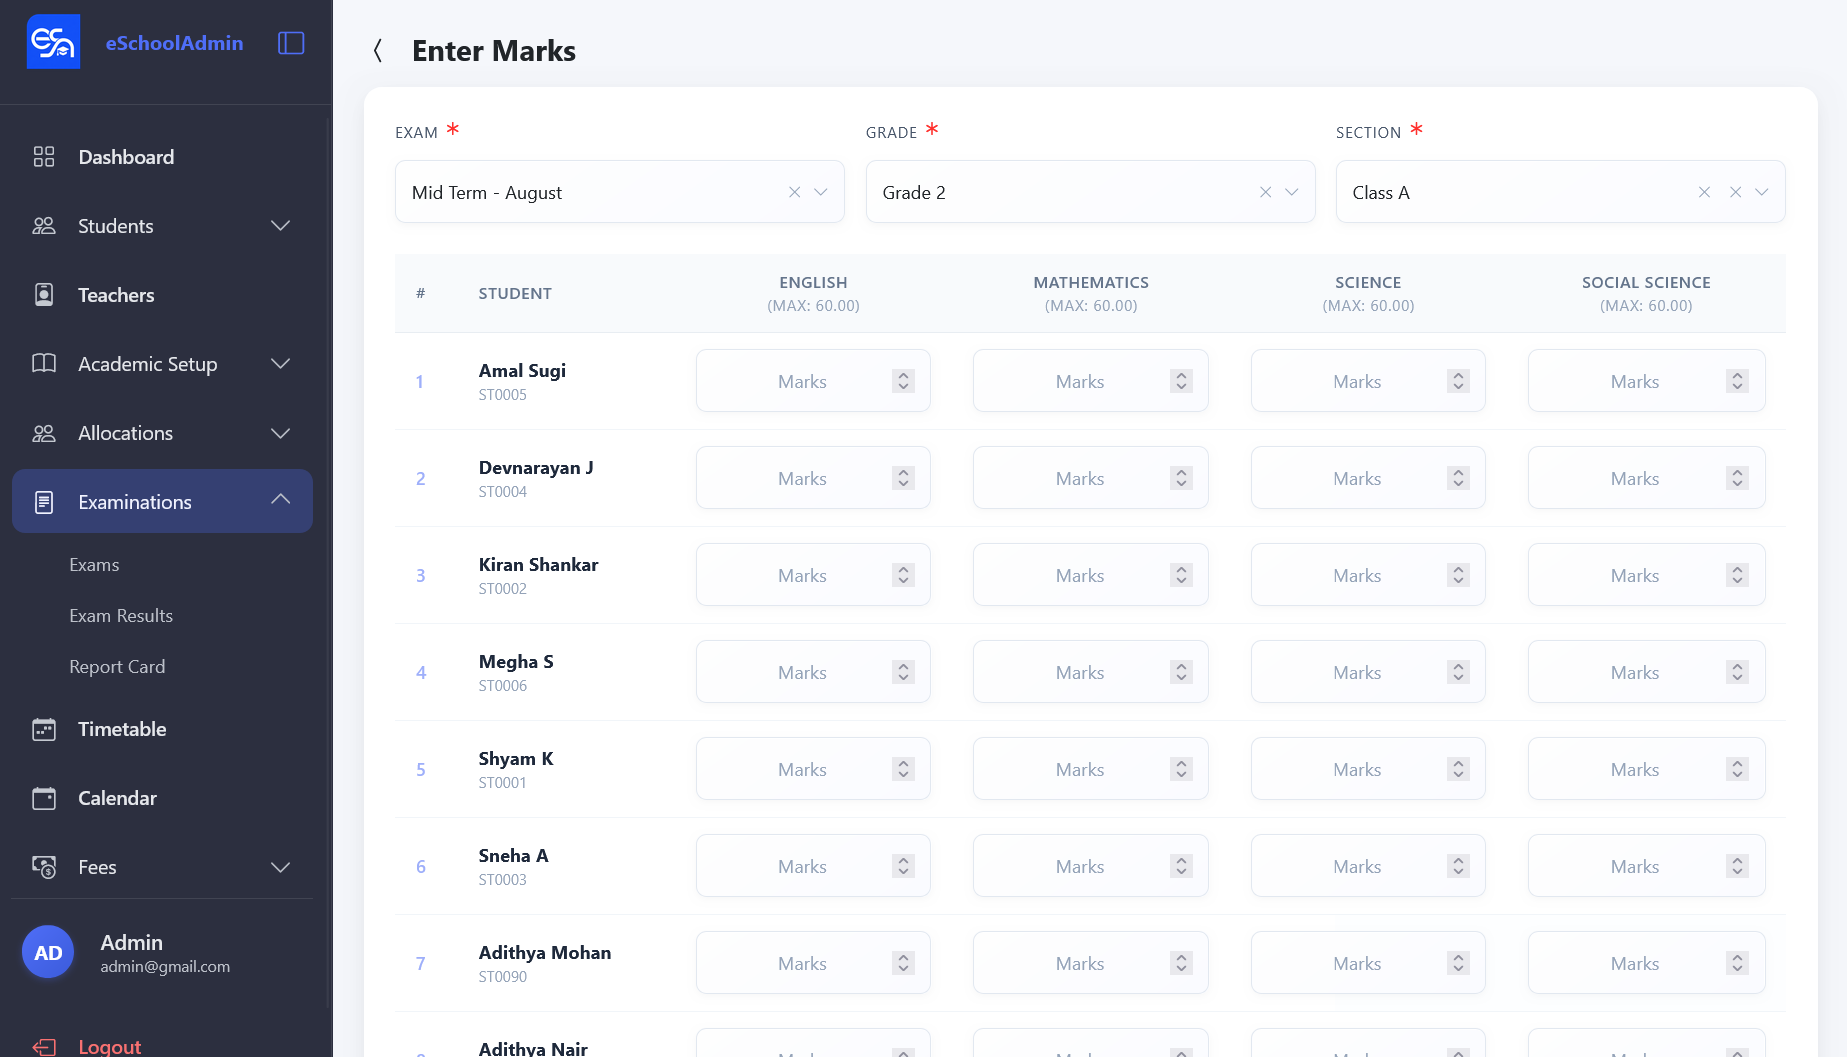
Exam Results — view scores per subject with automatic grading and pass/fail status.Enter Marks — select exam, grade, and section, then enter marks for each student per subject.
Grade Thresholds define score ranges for letter grades. Configure these under Examinations to enable automatic grading.
Grade Thresholds — define the score ranges used for automatic grading.
8. Report Cards
Generate a consolidated performance report for a student across all subjects in an exam.
Navigate to Examinations → Report Card.
Select the exam and the student (or browse by section).
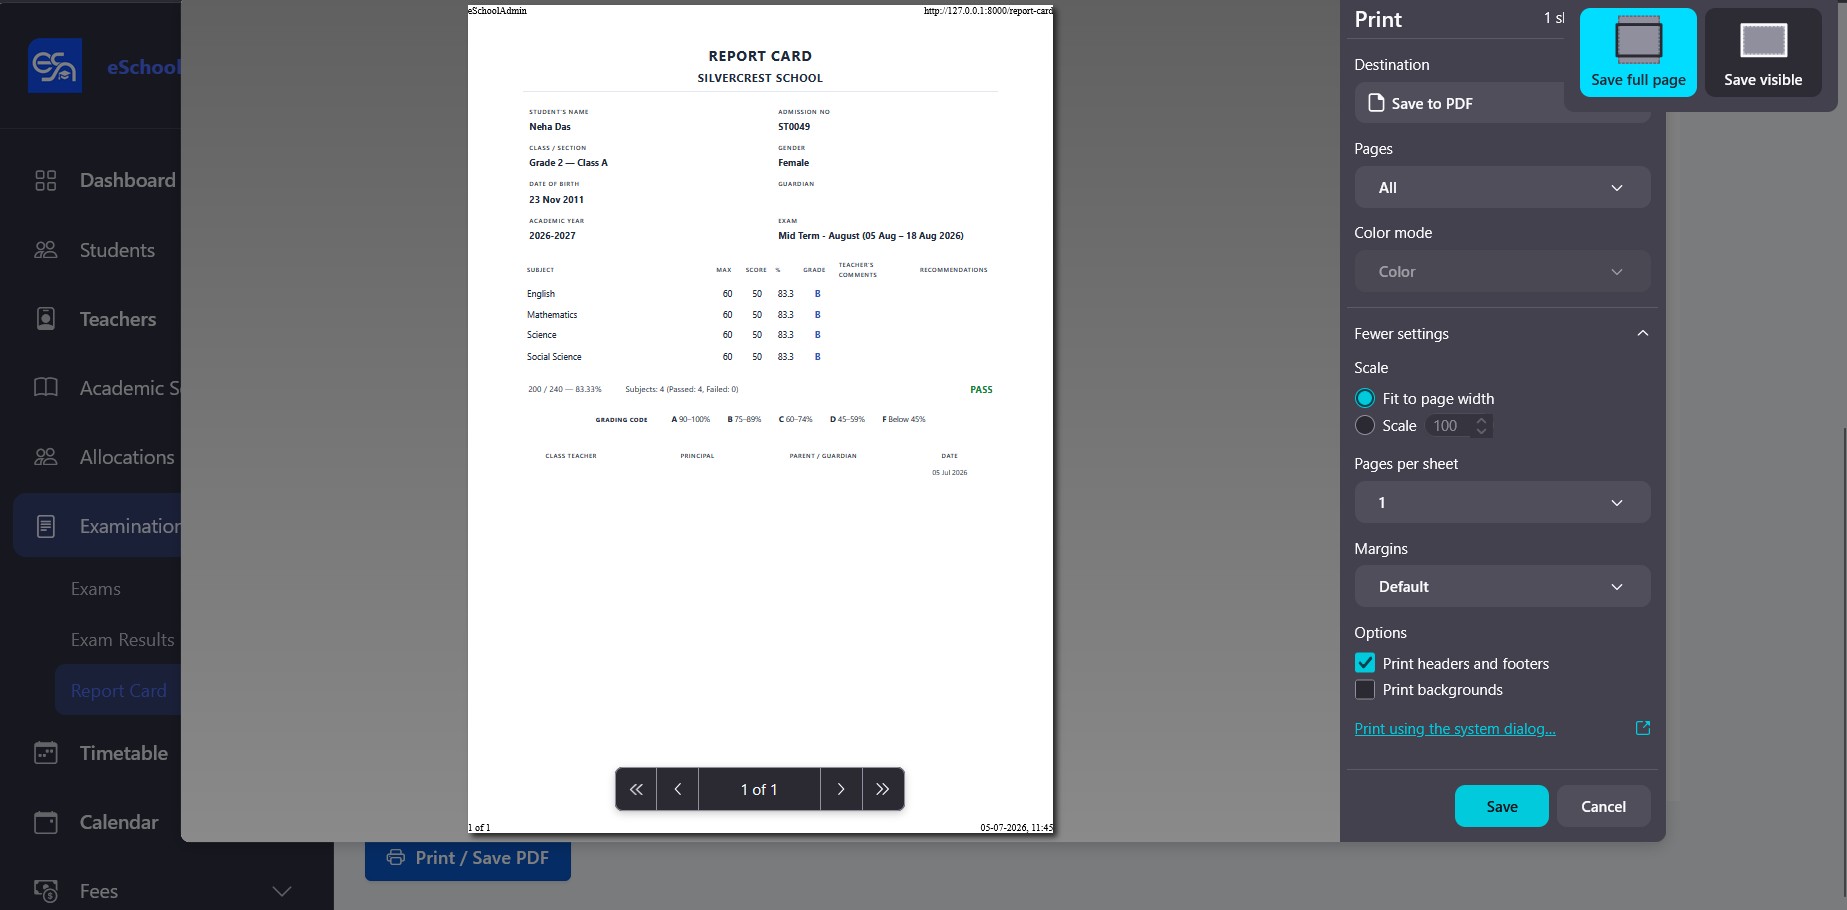
The report displays student info, scores per subject, grades, totals, and class position.
Report Card — printable view with student info, scores per subject, grades, totals, and class position.
9. Timetable
Generate and manage class timetables.
Navigate to Timetable in the sidebar.
Select the grade and section.
Set the days of the week and time slots, then assign subjects to each slot.
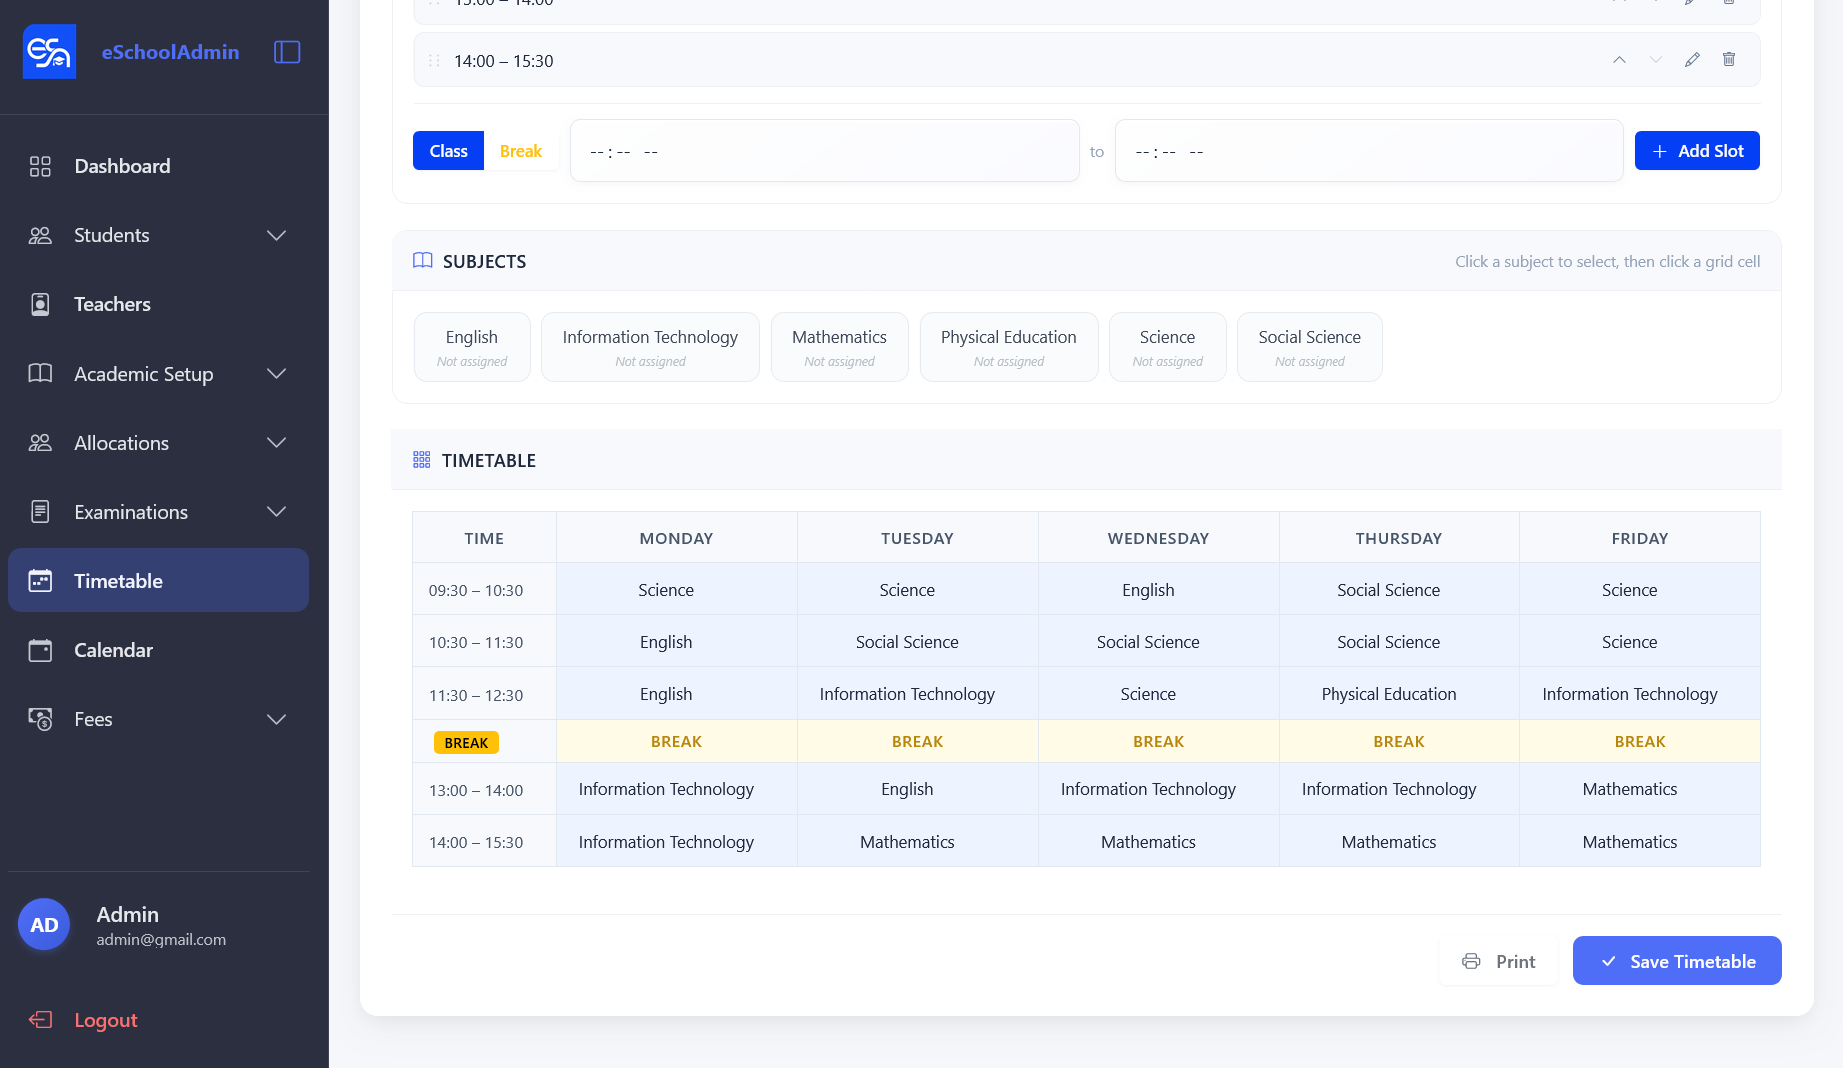
Timetable — drag and drop subjects into the weekly grid, then save.
10. Calendar & Events
Manage school-wide events, holidays, and reminders.
Navigate to Calendar in the sidebar.
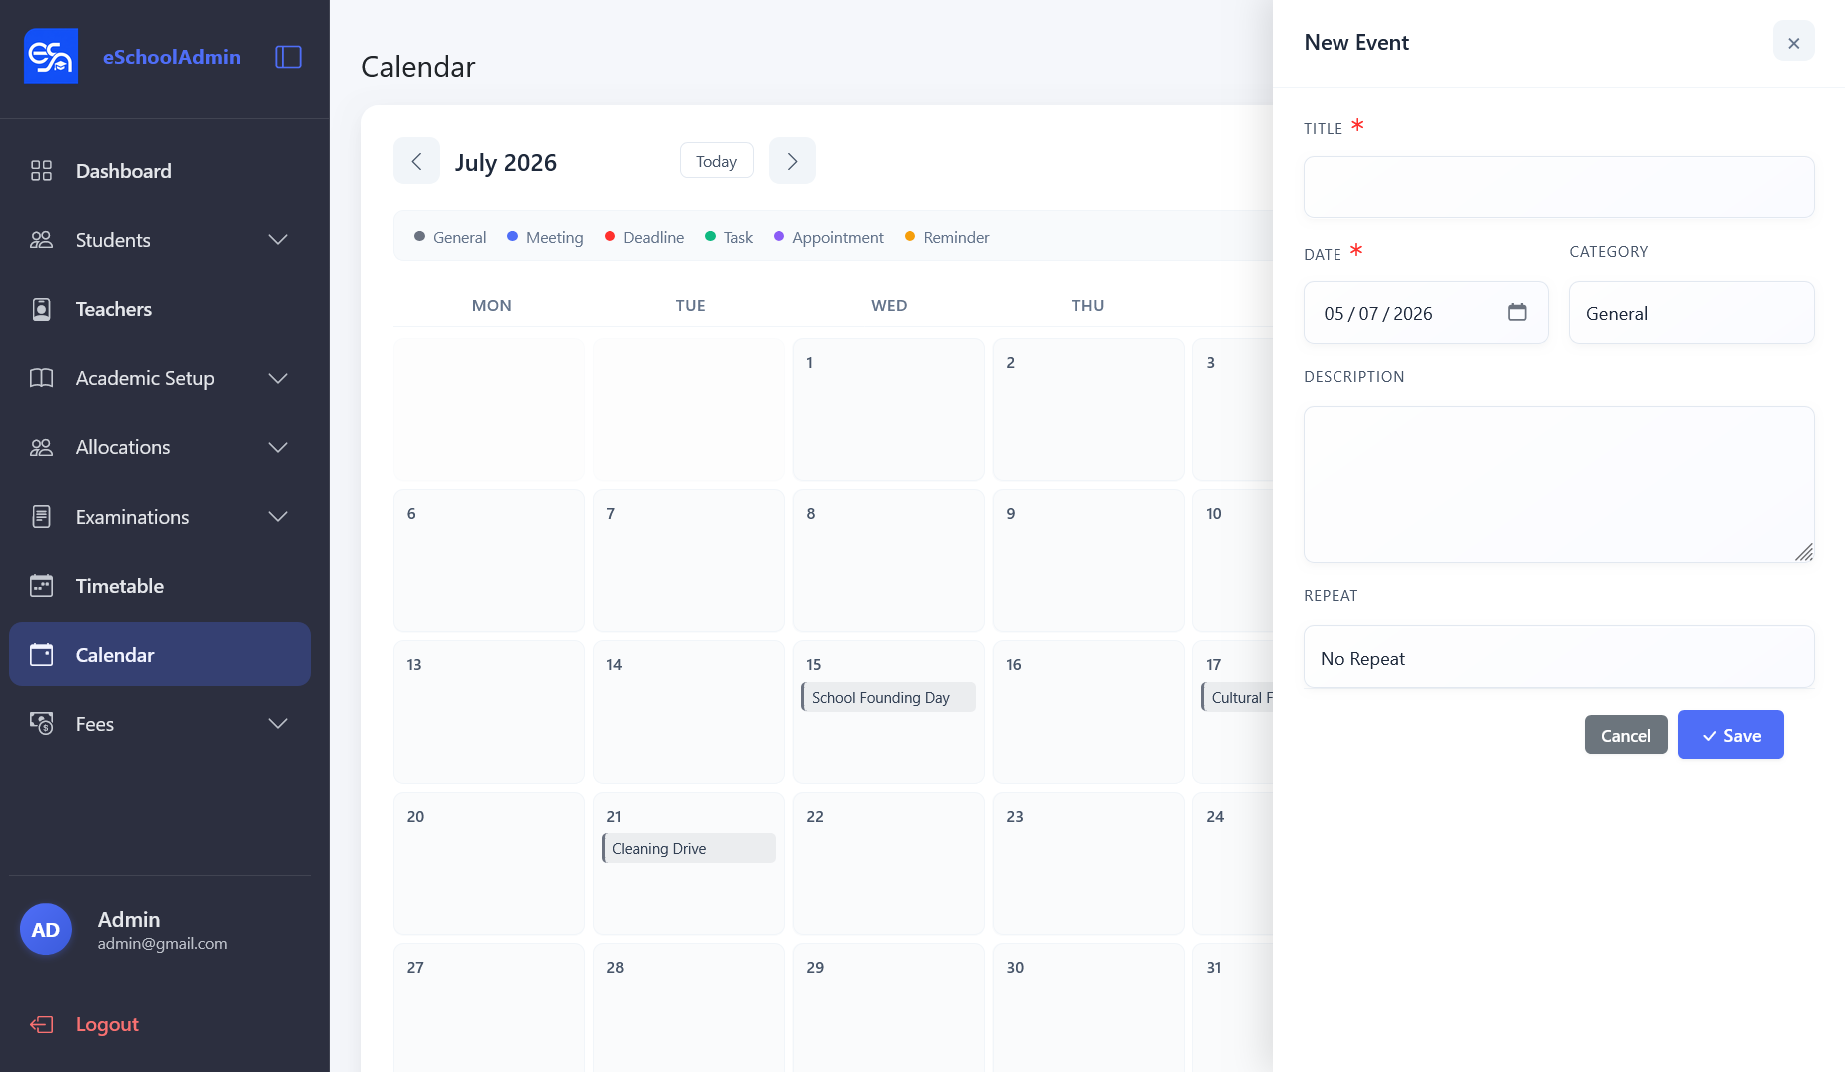
The list shows all scheduled events. Click Create Event to add a title, date/time, description, and type.
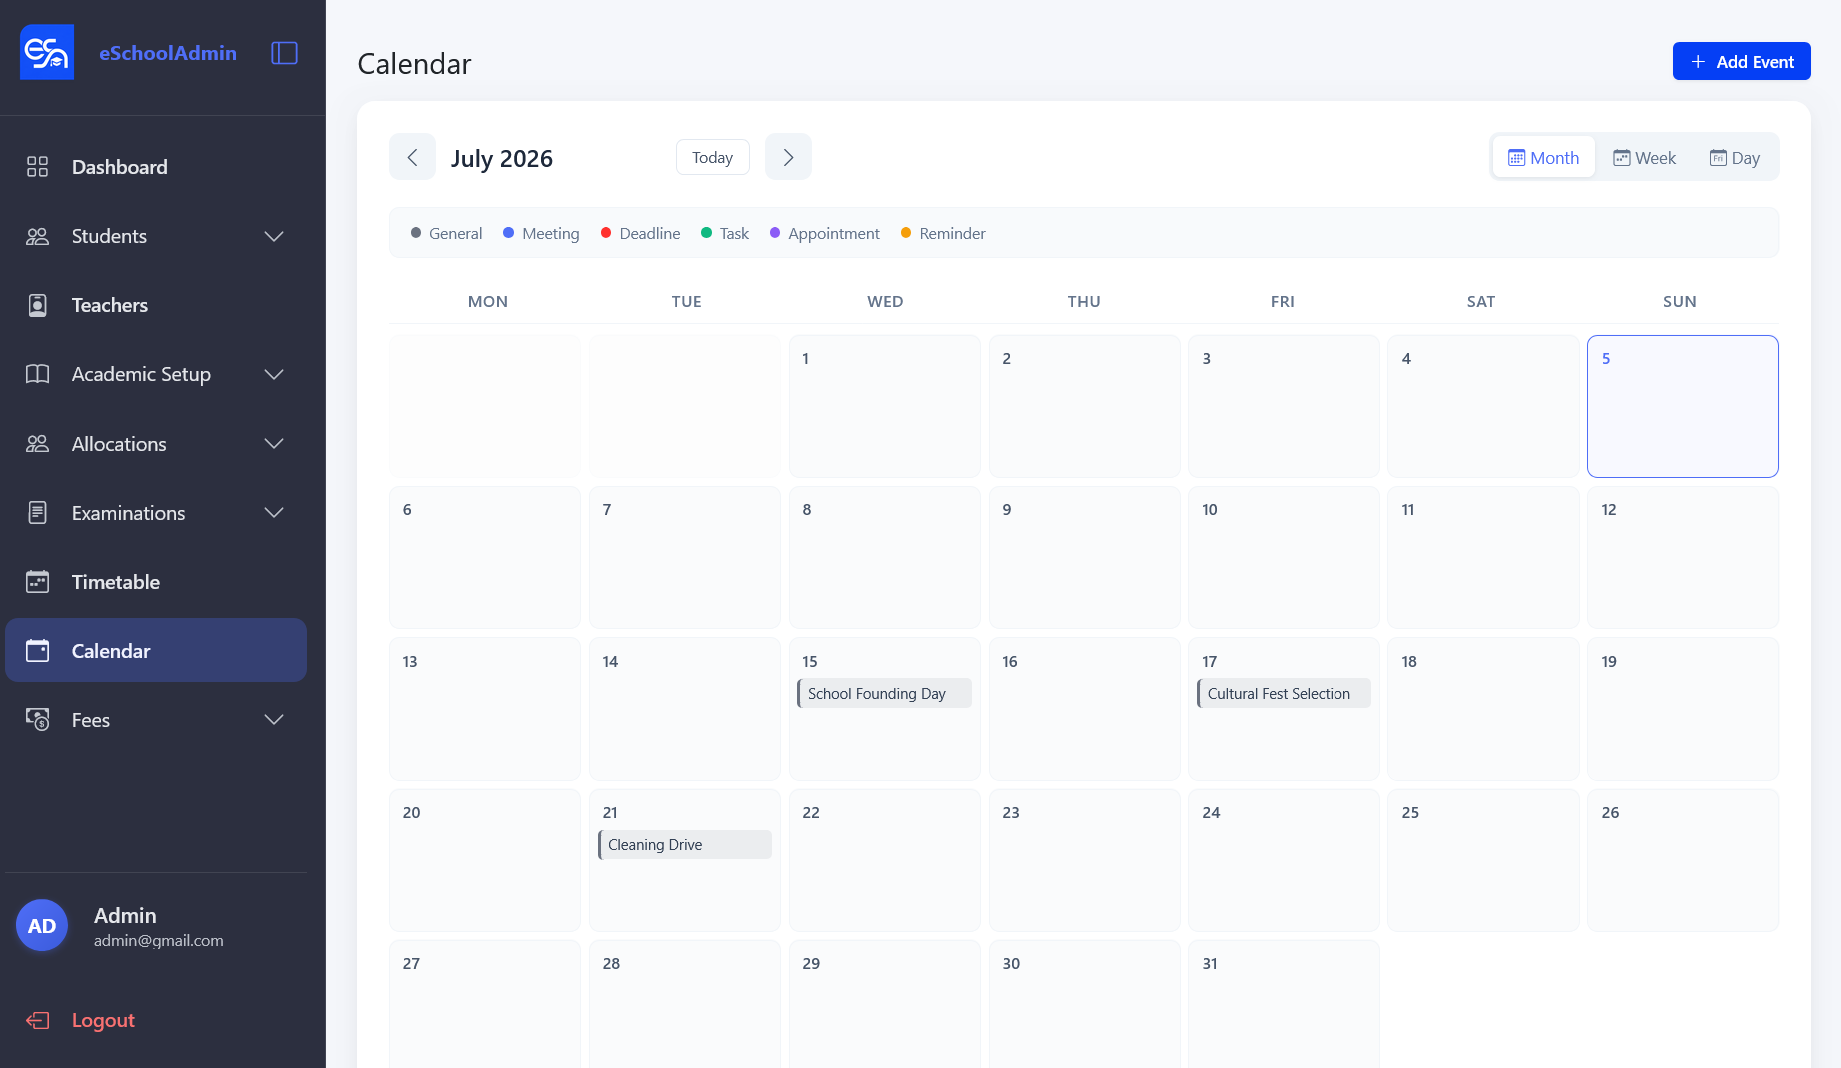
Calendar — monthly view with color-coded event types (General, Meeting, Deadline, Task, Appointment, Reminder).Create Event — enter title, date, category, description, and set repeat options.
11. Leave Management
Manage teacher leave requests with configurable leave types, balance tracking, and an approval workflow.
Leave Types
Admins define the types of leave available (e.g., Sick Leave, Casual Leave, Annual Leave) with an annual day quota.
Navigate to Leave Management in the sidebar, then switch to the Leave Types tab.
Click New Leave Type and enter the name, slug, annual quota, and optional description.
Edit or delete leave types from the context menu (right-click on a row).
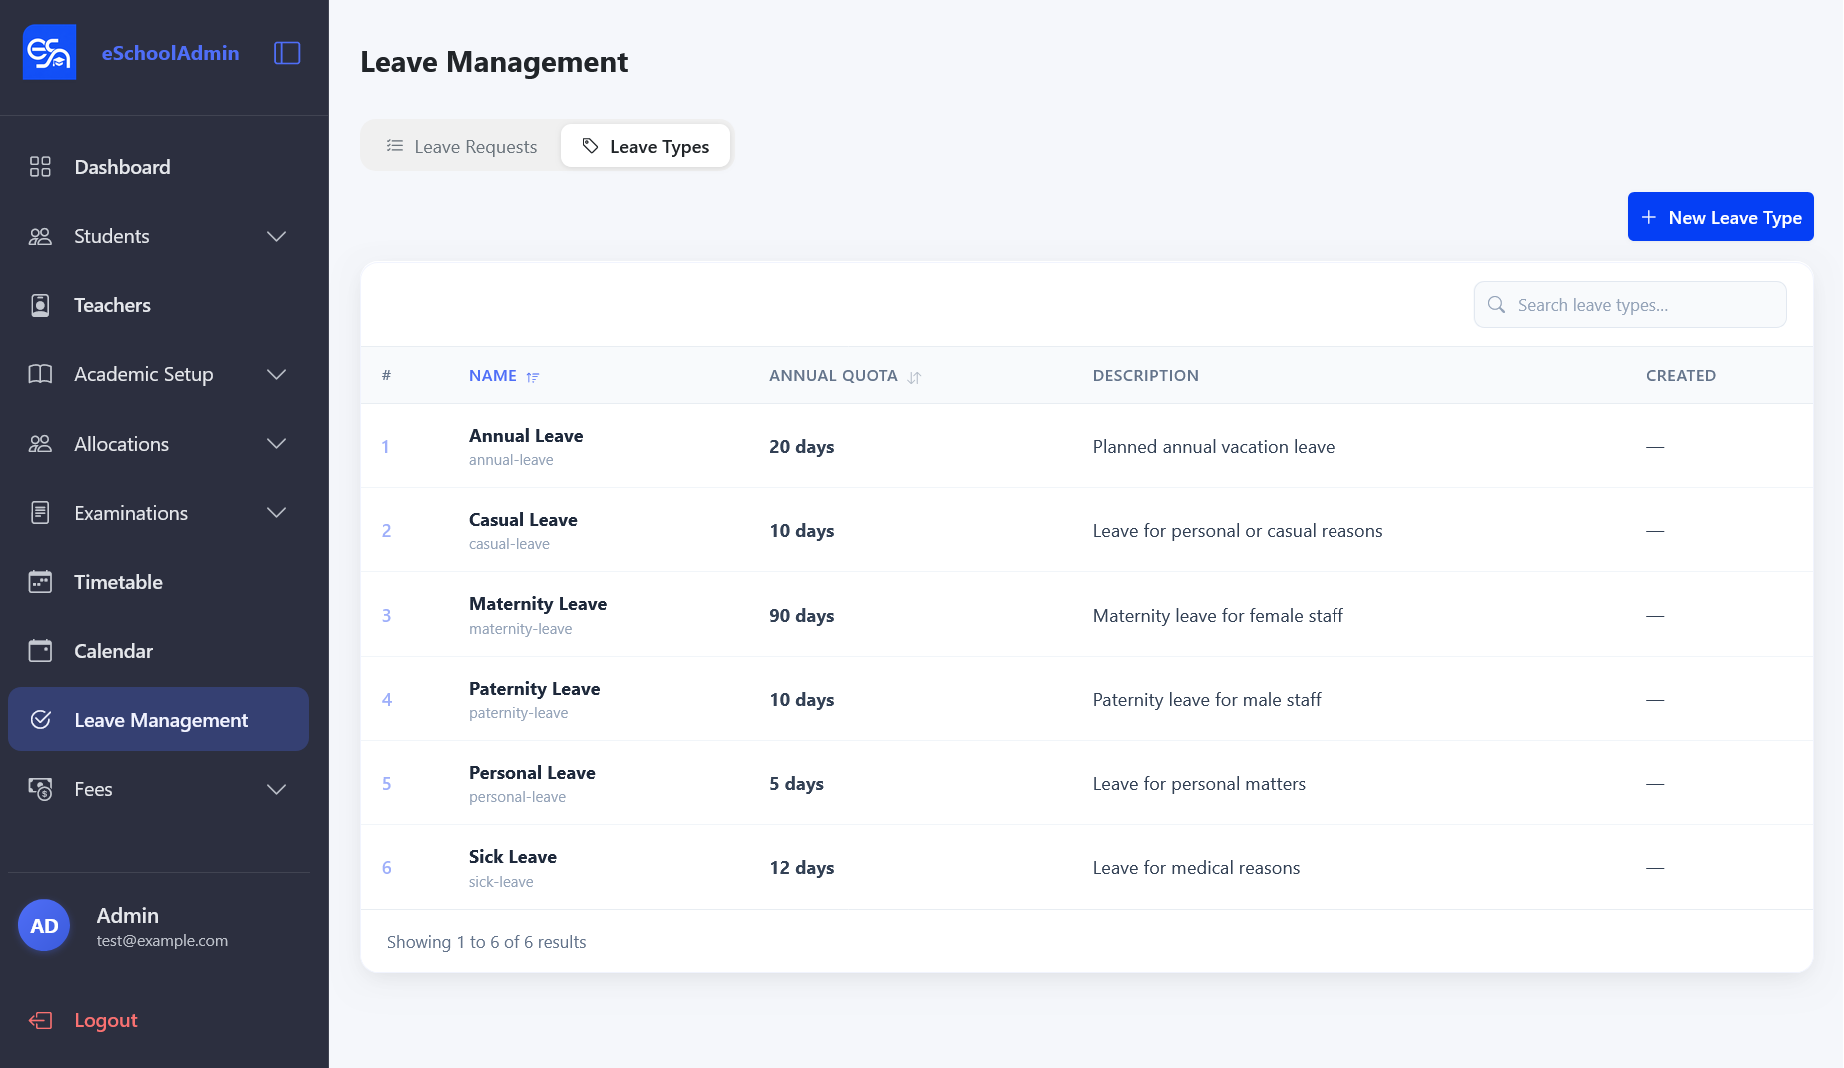
Leave Types — define available leave categories and their annual limits.
Teacher Leave Requests
Teachers can view their leave balance cards and submit requests.
Navigate to Leave Request in the sidebar.
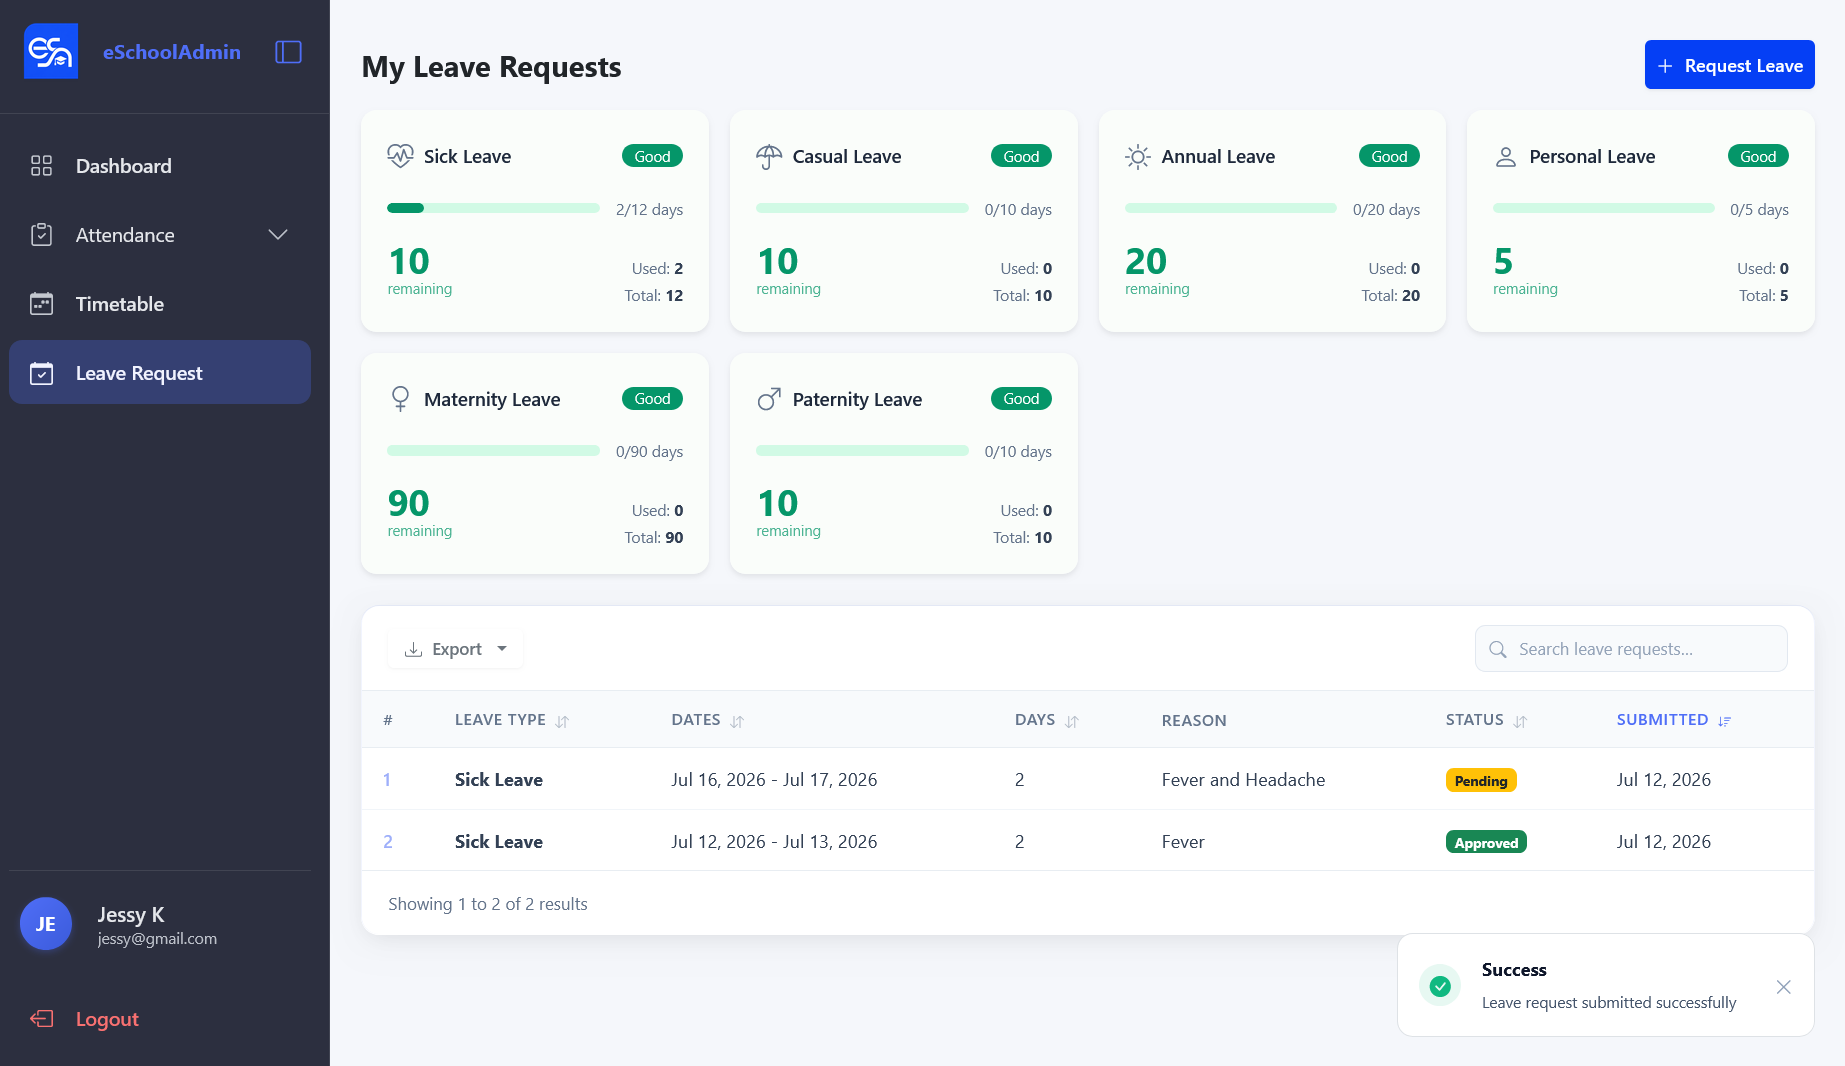
Balance cards show remaining days per leave type with a visual progress bar.
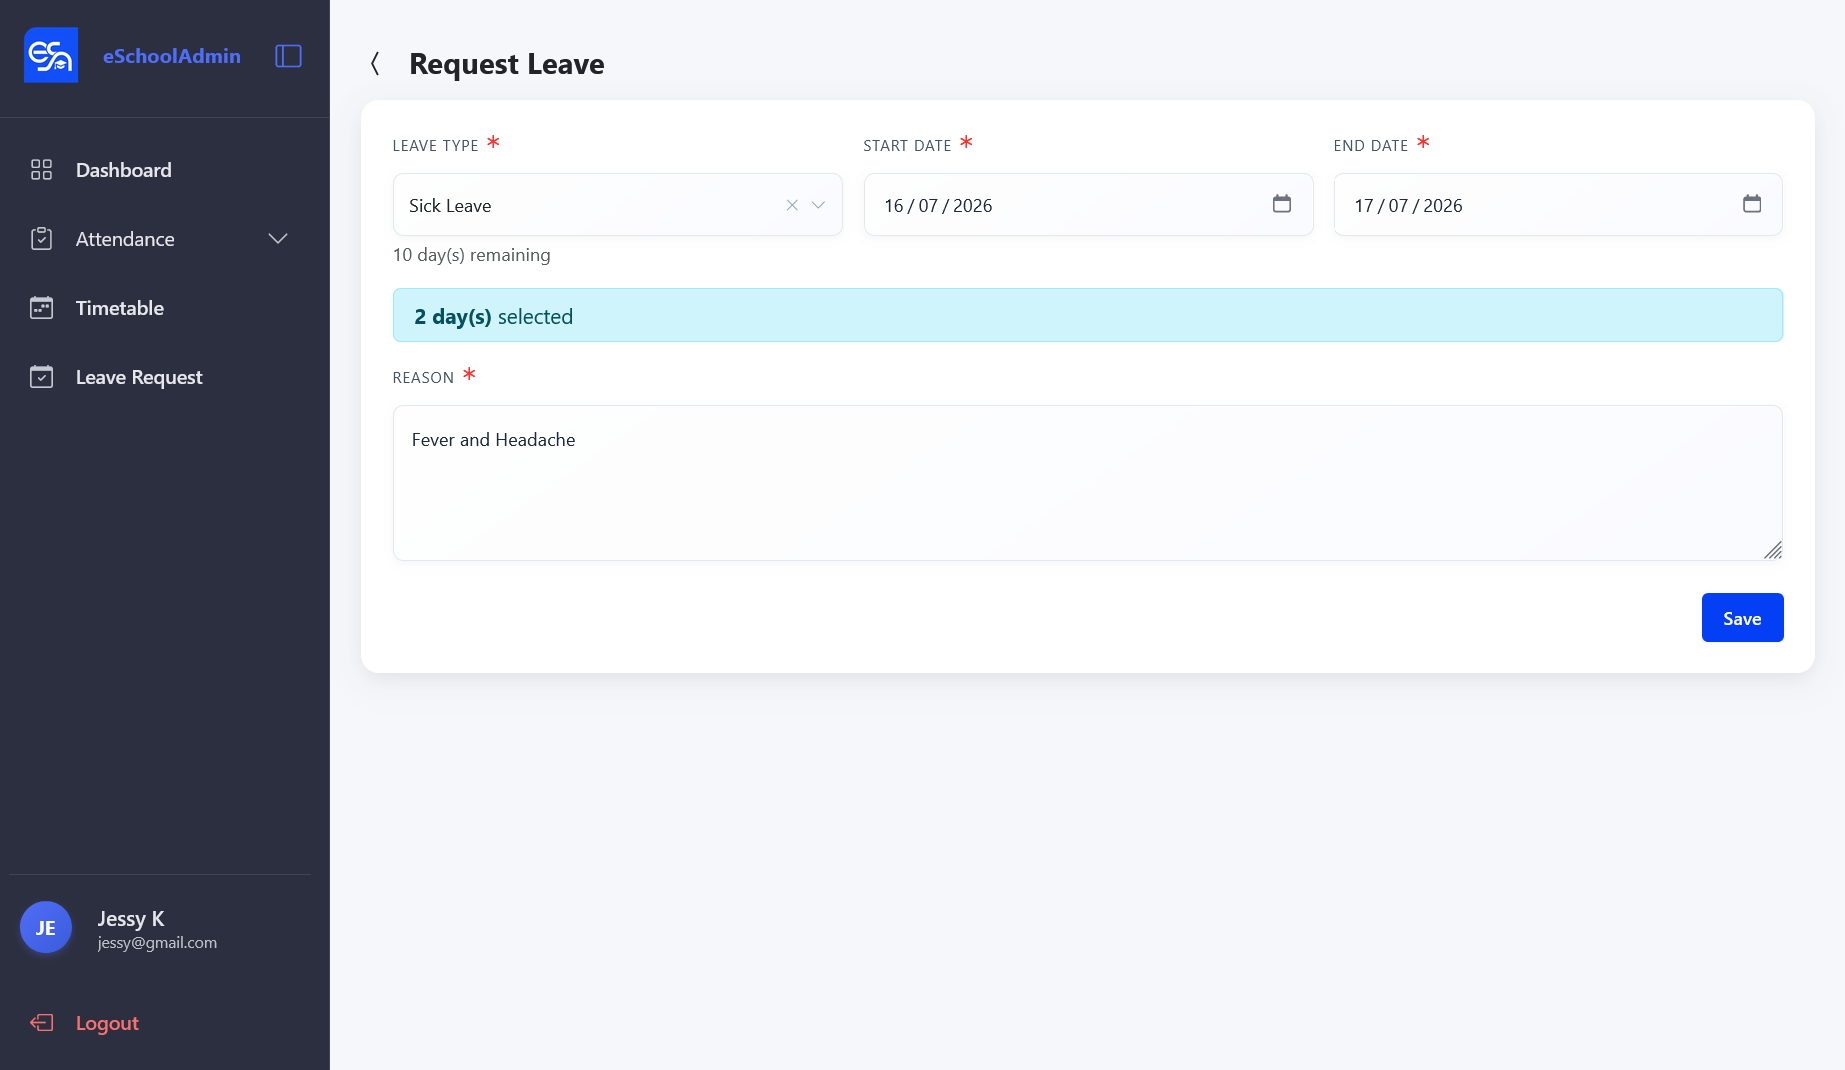
Click Request Leave, select the leave type, start/end dates, and provide a reason.
The system calculates total days and checks remaining balance before submission.
Teacher Leave — balance cards and request submission interface.
Admin Approvals
Admins review pending requests and approve or reject them.
Navigate to Leave Management → Leave Requests tab.
Filter requests by status (Pending, Approved, Rejected) or leave type.
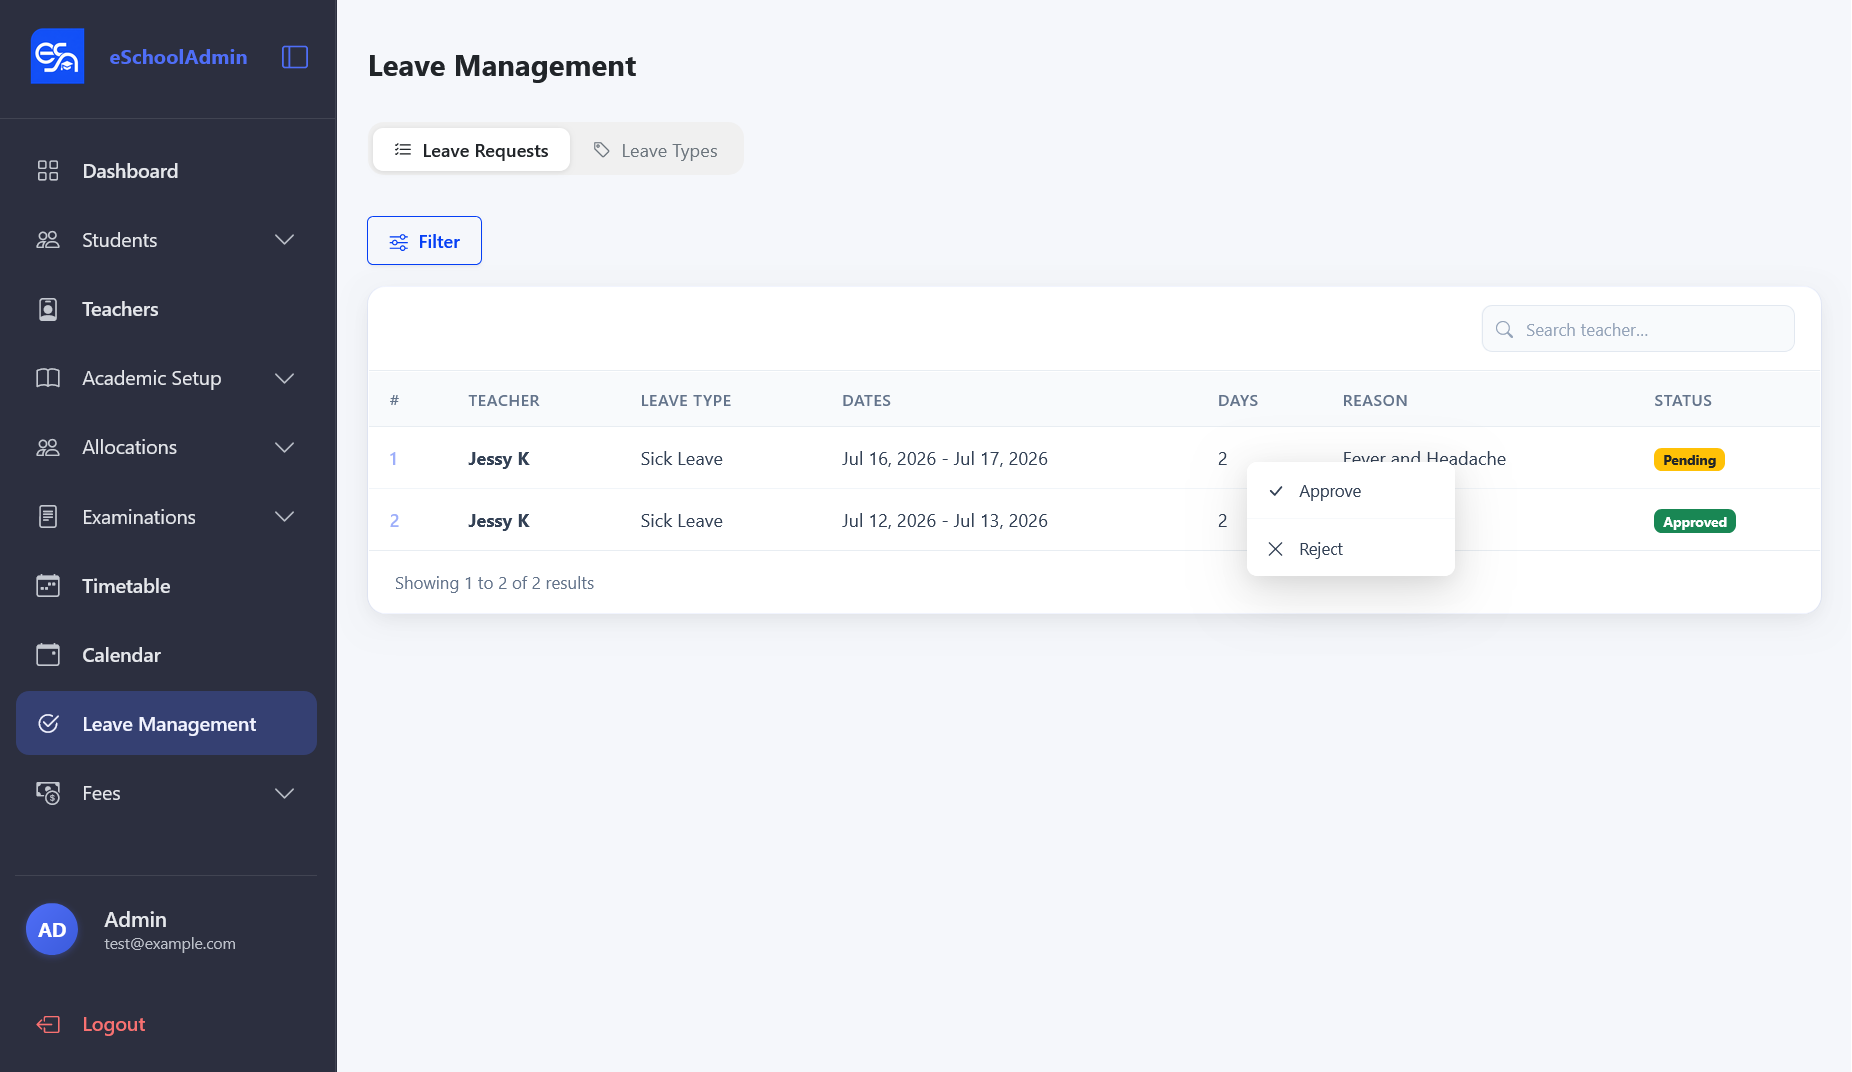
Right-click a pending request to Approve or Reject it.
When rejecting, an optional reason can be provided in the confirmation modal.
Admin Approvals — review and manage teacher leave requests.
12. Student Promotion
Promote students to the next grade at the end of an academic year.
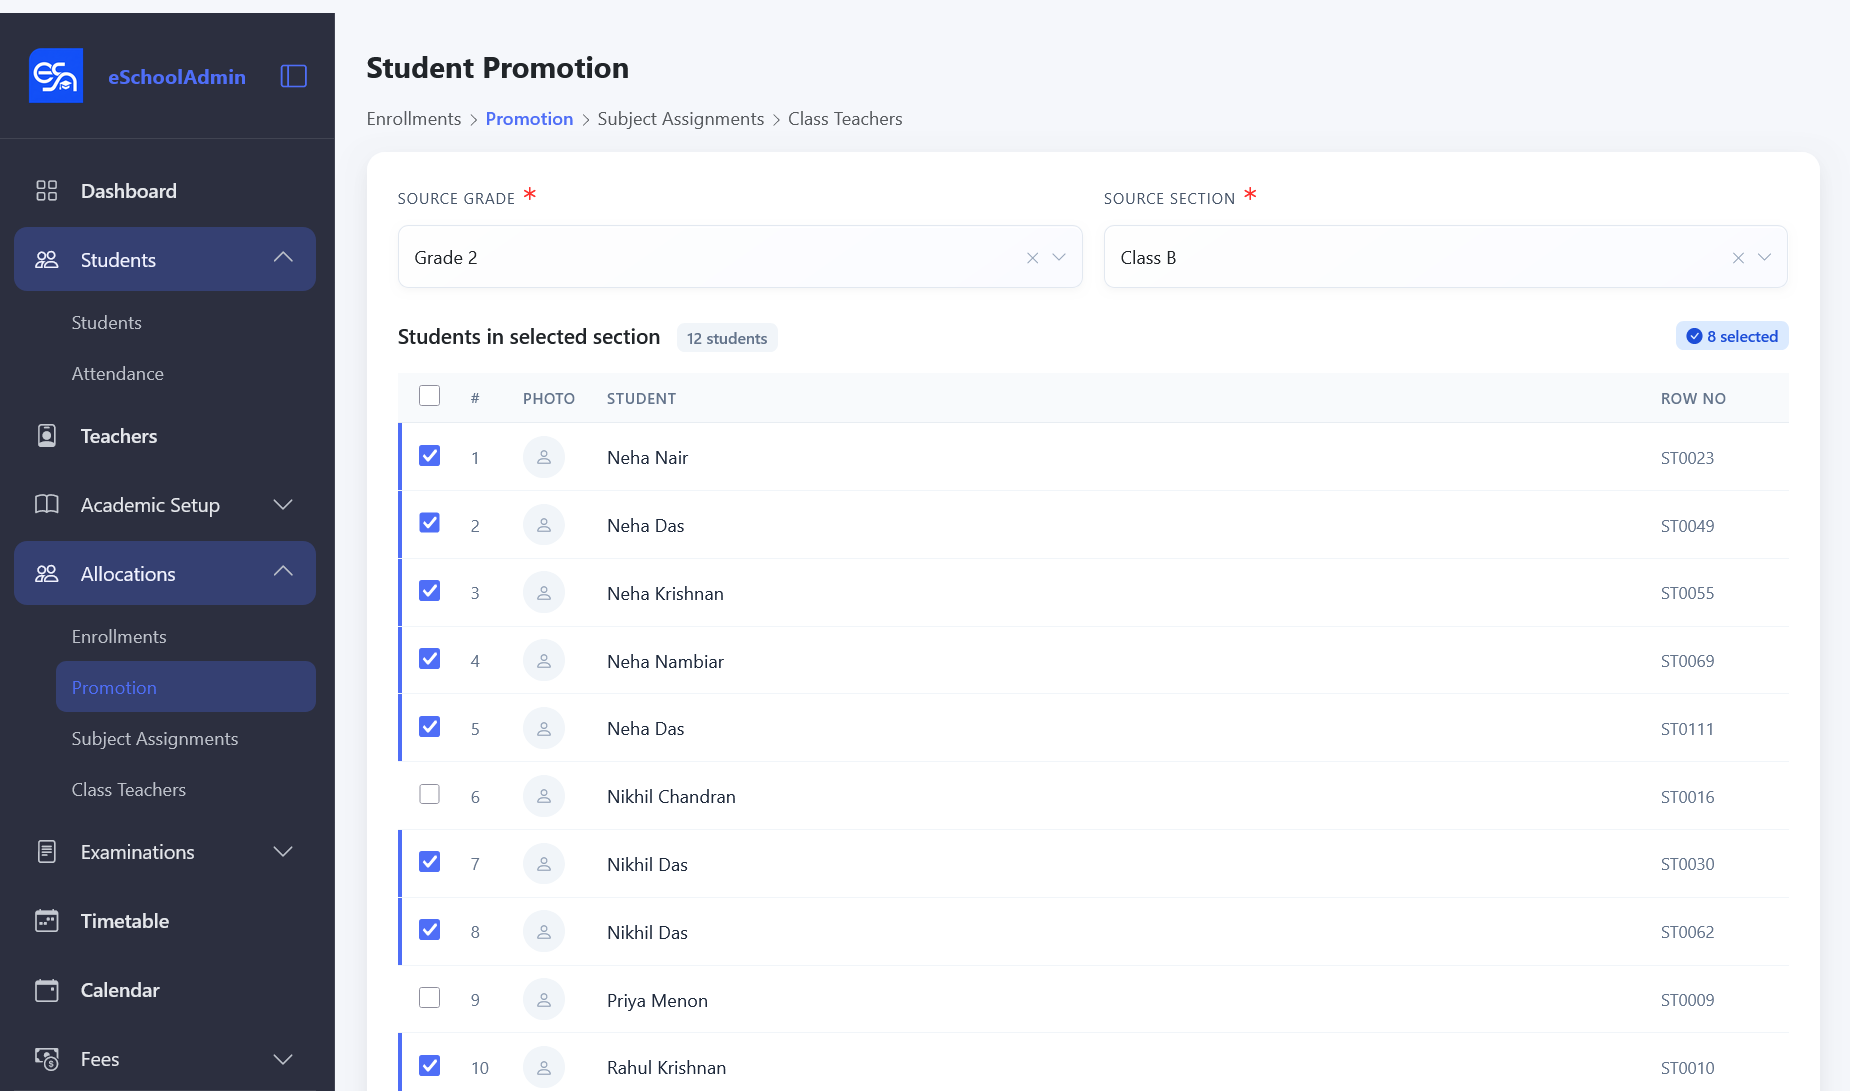
Navigate to Allocations → Promotion.
Select the current academic year and grade.
For each student, select the next grade and section for the upcoming year.
Optionally mark students as repeating or graduated, then submit.
Enrollments for the new academic year are created automatically.
Student Promotion — select source grade and section, then choose students to promote.
13. Import & Export
Excel Import (Bulk Student Registration)
Quickly add many students at once using an Excel file.
Navigate to Students → Import (from the student list page).
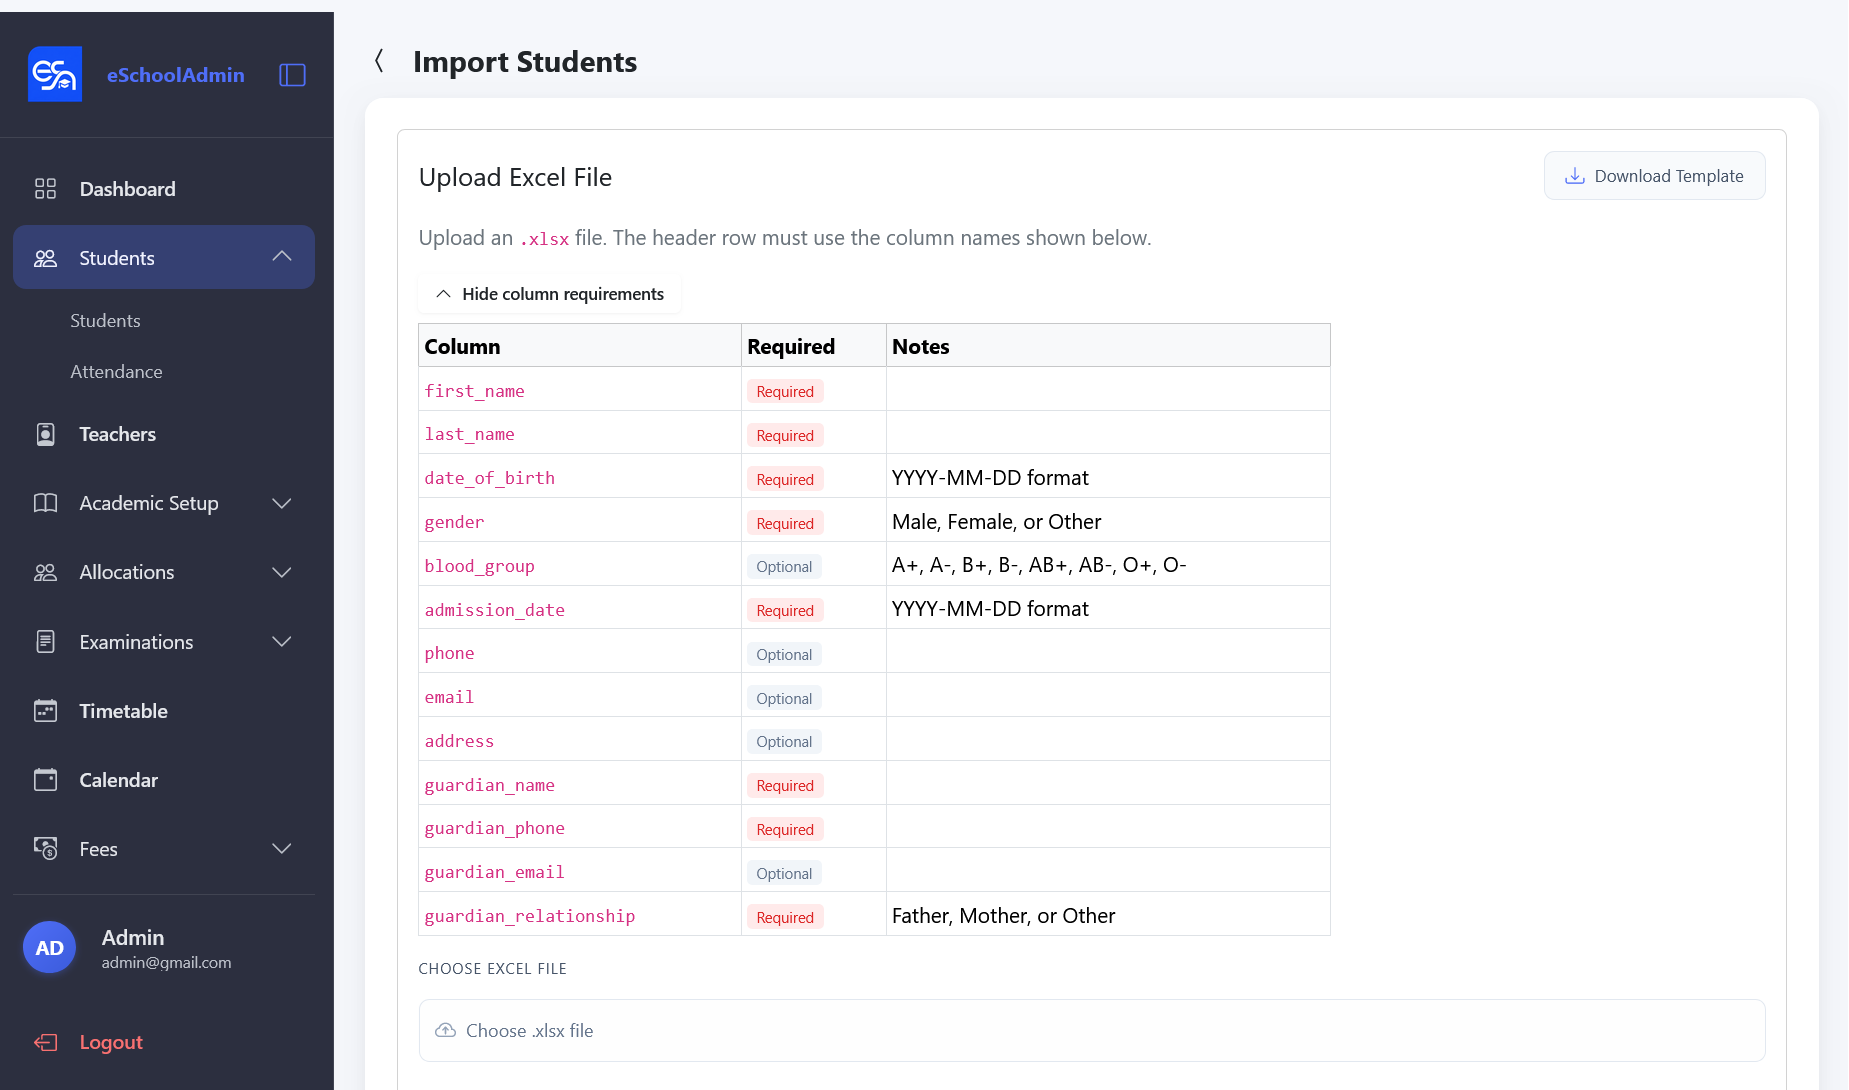
Download the Import Template for the correct column format.
Fill in student data, save, and upload the file.
The system validates and imports the data, reporting any invalid rows.
Import Students — upload an .xlsx file with the required columns (first_name, last_name, date_of_birth, gender, etc.).
Data Export
On most list pages, an Export dropdown is available to download data as Excel (.xlsx) or CSV.
On most list pages, click the Export dropdown to download data as Excel (.xlsx) or CSV.
14. Recommended Workflow
The suggested setup order for a new school year:
Academic Year — Create the school year
Grades — Define grade levels
Sections — Create classrooms within grades
Subjects — Define subjects taught
Students — Register student records (or bulk import)
Teachers — Register teaching staff
Enrollment — Assign students to grades and sections